


Want your product demo to actually convert viewers into paying customers? Then it needs to be more than just a dry walkthrough of features. A compelling product demo should feel like a personal, guided experience one that draws viewers in, builds trust, and shows them exactly how your product can solve their problem or improve their life.
In today’s fast-moving digital world, people don’t just want to see what a product does they want to understand why it matters to them. A well-executed on-camera product demo can do just that. It combines visuals, storytelling, and clear instruction to create an emotional connection while answering common questions before your audience even has to ask.
In this guide, we’ll walk you through the key steps to filming a standout product demo that not only looks professional, but also drives real results. Whether you’re showcasing a tech gadget, skincare item, kitchen tool, mobile app, or anything in between, these tips will help you make your product shine on camera and convince viewers to take action.
1. Start With a Clear Purpose

Before you even think about hitting the record button, take a step back and ask yourself: What exactly do I want this demo to achieve? Having a clear, specific purpose is the foundation of any effective product demo. Are you aiming to highlight standout features? Demonstrate how easy it is to use? Show a side-by-side comparison with a competitor’s product? Or perhaps you want to reveal a new update or explain a key benefit that often gets overlooked.
Your answer will directly influence how you plan the entire shoot from your script and shot list to pacing and tone. For example, if your goal is to simplify a complex product, you might want a slower, more explanatory approach with plenty of close-ups. On the other hand, if you’re comparing products, you’ll need a structured format that shows both items in use under similar conditions.
When the purpose is vague, it’s easy to drift into a scattered presentation that either overwhelms the viewer with information or underdelivers on clarity. But when your goal is sharp and focused, your messaging becomes stronger, and your video is more likely to connect with your audience and drive the desired action whether that’s a sign-up, a purchase, or simply more product interest.
So before you begin writing a script or setting up your camera, take the time to define your “why.” It’ll save you time in production and help keep your demo streamlined, engaging, and effective.
2. Script It Like You Talk

The best product demos don’t sound robotic or overly rehearsed they sound like a real person, explaining something they love. That’s why your script should be written the way you actually talk. Imagine you’re showing the product to a curious friend across the table. How would you describe it? What would you emphasise? Where would you pause to let the product do the talking?
Instead of cramming in technical jargon or long-winded explanations, focus on clear, conversational language that makes your audience feel at ease. Keep your sentences short and punchy, and break up your ideas into digestible chunks. This keeps the energy up and helps your viewers stay engaged throughout the demo.
Another important tip: prioritise benefits over features. Don’t just say, “This blender has a 1000-watt motor.” Show what that means: “You can crush ice in seconds for smoothies that are restaurant-quality.” Help the viewer picture how the product fits into their life.
And don’t forget to sync your visuals with your words. Every sentence in your script should match what’s happening on screen. If you’re talking about how easy it is to clean the product, show that cleaning process clearly. This alignment reinforces your points and makes the demo feel cohesive and purposeful.
The tone you strike in your script sets the stage for the entire demo so keep it light, confident, and above all, human.
3. Nail the Framing and Camera Angles
Your camera work is just as important as your script because how you frame the product directly affects how viewers perceive it. Poor angles or cluttered visuals can make even the best product feel underwhelming. That’s why it’s worth spending time getting your shots just right.
Start by thinking about what each part of your demo needs to show. A wide shot is great for setting the scene especially at the beginning. It gives your audience a sense of space, shows who’s speaking (if you’re on camera), and helps them get oriented. Once the intro is done, move into close-ups to highlight the product itself. These are essential for drawing attention to important features, textures, buttons, or small details that might be missed from farther away.
Overhead shots (sometimes called “top-down” or “flat lay” angles) are particularly effective for unboxings, product assemblies, or hands-on demos like applying a cream, using a kitchen tool, or assembling a tech gadget. They give viewers a clear, step-by-step view of what’s happening without visual distractions.
Make sure the product stays in focus and centred, and be mindful of your background. A messy or overly colourful setting can pull attention away from what you’re showcasing. Aim for a clean, neutral background unless it adds to the story like a bathroom counter for a skincare demo or a desk setup for a tech device.
Also consider adding dynamic angles to keep things visually interesting. A slight tilt, a sliding movement (with a slider or gimbal), or even a quick zoom can add polish and energy, especially if your product has moving parts or a tactile experience.
In short: think like a viewer. What would you want to see up close? What angle best explains what’s happening? With the right framing, your product takes centre stage and looks its absolute best.
4. Use Lighting to Your Advantage
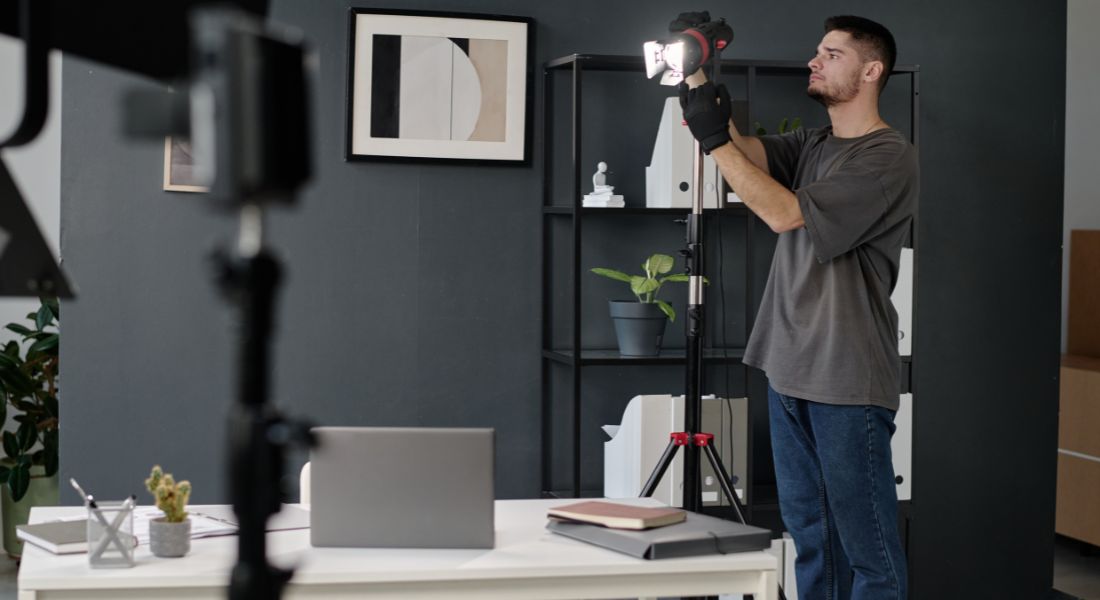
Lighting is one of the most underrated yet powerful tools in product video production. It doesn’t just make your setup look more professional it can completely change the way your product is perceived. Poor lighting can make even a premium item look dull or cheap, while good lighting brings out colours, textures, and design details that might otherwise go unnoticed.
The goal is to create soft, even lighting that flatters both the product and the environment. Harsh shadows or intense glare can distract the viewer and make it hard to see what you’re demonstrating. To avoid this, use diffused light from multiple sources. If you’re working with natural light, position your setup near a large window during the day and use a white curtain to soften any harsh sunlight.
That said, natural light isn’t always predictable it changes throughout the day and can cast different tones depending on the weather. For more control and consistency, many creators turn to LED panel lights or softboxes. These give you adjustable brightness and colour temperature, so you can keep your lighting steady from one shot to the next even if you’re filming over several hours or days.
A typical setup might involve a key light (your main source, usually positioned at a 45-degree angle from the product), a fill light on the opposite side to soften shadows, and a backlight or hair light to add separation between the subject and the background. You can also bounce light off white walls or reflectors to create a natural, balanced look.
No matter what lighting setup you choose, always test it on camera before you start filming the full demo. What looks fine to the naked eye can often appear too dark, blown out, or uneven once recorded. Use your test footage to check for reflections (especially on shiny or glass surfaces), unwanted shadows, or colour inconsistencies.
A well-lit video instantly tells your audience that you care about quality and helps them see every detail of your product in the best possible light.
5. Focus Pulls and Movement Add Depth
If you want your product demo to stand out and feel a notch above standard walkthroughs, incorporating camera movement and focus techniques can make a big difference. These subtle visual elements help add polish, professionalism, and a more cinematic feel to your video without requiring a blockbuster-level budget.
One of the most effective tools in your visual storytelling kit is the focus pull (also known as rack focus). This is when the focus shifts smoothly from one part of the frame to another for example, starting on the product’s logo and then shifting focus to a user’s hand pressing a button. It’s a powerful way to guide the viewer’s attention and create a sense of flow. It also gives your video that sleek, high-production-value vibe that audiences instinctively respond to.
Similarly, simple camera movements like pans, tilts, and slider shots can make your demo feel dynamic and professional. For instance, a slow horizontal slide across the product can reveal its form from different angles, while a gentle tilt can emphasise height or scale. These movements help build visual interest and keep viewers engaged especially during parts of the video where there’s less talking or action.
But here’s the key: use movement with intention. Too many fancy camera tricks can feel distracting or even dizzying. You don’t want viewers focused on your camera work instead of the product. Keep your motions smooth, measured, and relevant to the story you’re telling. Every pull, pan, or slide should have a clear reason whether it’s revealing a new detail, shifting focus to a feature, or following a user’s interaction.
Even if you don’t have professional gear like motorised sliders, you can still create clean movements using a sturdy tripod with a fluid head, or DIY rigs like placing your camera on a flat surface and carefully sliding it on a folded towel for smooth glides.
Ultimately, it’s not about flashy effects it’s about helping your audience feel the product’s design, usability, and purpose through thoughtful, well-crafted visuals.
6. Keep Your Pace Viewer-Friendly
A product demo is only effective if your audience can follow along without feeling overwhelmed or lost. That’s why pacing is so crucial. Move too quickly, and viewers might miss key details. Go too slowly, and you risk losing their interest. The sweet spot lies in a steady, viewer-friendly rhythm that gives people time to absorb each piece of information without zoning out.
Think about how your viewers are watching often on a mobile screen or while multitasking. Clear, deliberate pacing helps ensure they stay engaged and retain what they’re seeing. When you introduce a new feature, give it a moment to breathe. Show it, explain it, and then pause just for a second before moving on. That brief pause acts as a mental reset, allowing the viewer to process what they’ve just learned.
If you’re using a voiceover or speaking on camera, match your narration carefully to the visuals on screen. Say you’re demonstrating a button that triggers a unique function make sure your explanation aligns exactly with that moment of interaction. Out-of-sync audio and visuals can create confusion and diminish the trust viewers place in your demo.
Repetition, when used sparingly, is also helpful especially for complex steps or key benefits. If a feature is particularly important, don’t be afraid to restate its value in a slightly different way, or show it in action again from a new angle. This reinforces your message and makes it more memorable.
Above all, aim for clarity over speed. It’s not a race to the finish it’s about guiding your audience through a helpful, easy-to-follow experience that builds confidence in your product.
7. Record Voiceovers Separately (Then Sync)
When it comes to product demos, audio quality can make or break your presentation. If your voice sounds muffled, rushed, or is full of distracting background noise, viewers are likely to click away no matter how great your visuals are. That’s why recording your voiceover separately from your video footage is almost always the smarter choice.
Recording voiceovers independently gives you more control over clarity, tone, and pacing. You’re not trying to narrate perfectly in real time while managing the product, camera, and lighting all at once. Instead, you can focus purely on delivering your lines with confidence, consistency, and the right energy. If you stumble, no problem you can simply pause, redo a line, and edit out any awkward bits later.
This method also allows for post-production cleanup. You can remove background hums, reduce mouth clicks or breaths, and smooth out awkward pauses with basic audio editing tools. Even inexpensive USB microphones paired with free software like Audacity or GarageBand can give you professional-sounding results if recorded in a quiet, echo-free environment.
Once your voiceover is clean and polished, it’s time to sync it with your video footage. To make this step easier, use scripted markers small, intentional pauses or distinct phrases that correspond with key moments in your video. You can also jot down a rough timecode guide while recording your visuals to speed up the editing process.
And don’t forget: syncing isn’t just about lining up the voice to match what’s on screen it’s about enhancing the viewer’s understanding. You want your words and visuals to feel like they’re working in harmony, not competing for attention.
By separating your audio and visuals, you get the best of both worlds: clean sound and flexible editing options. The end result? A more polished, professional demo that keeps your audience focused on what really matters your product.
8. Highlight Benefits Visually
It’s not enough to simply tell your audience that your product is “easy to use,” “time-saving,” or “powerful” you have to show them. Today’s viewers are highly visual and naturally sceptical of marketing claims, so your demo should back up every benefit with a clear, visual example. Instead of saying, “It assembles in seconds,” film yourself actually assembling it ideally without tools, fuss, or confusion. If you’re showcasing a digital product, record your screen as you navigate the interface effortlessly, demonstrating how intuitive the experience really is.
Visual reinforcement builds credibility and trust. Let your product speak for itself by capturing moments that answer common buyer questions like “Will this work for me?” or “Is it worth the price?” Show how the product fits seamlessly into everyday scenarios: someone easily applying a skincare product with one hand, a parent using a child-proof feature with confidence, or a user navigating an app in real time without tutorials. These moments tell a story that words alone can’t, making your message more memorable and impactful.
9. Keep Branding Consistent
Every product demo is a chance to reinforce your brand identity. Subtle elements like on-screen text, logo placement, typography, and colour schemes should all reflect your established brand look and feel. This consistency doesn’t just make your video more visually appealing it strengthens brand recognition and builds trust over time. When viewers see a unified aesthetic across your content, it signals professionalism and reliability.
However, branding should always enhance the viewing experience not distract from it. Avoid overloading your video with too many graphics, bold animations, or logos in every corner. Instead, aim for a clean, thoughtful layout that keeps the focus on the product while subtly reminding viewers who you are. A well-placed logo in the corner, consistent font styling, and a brief branded intro or outro can go a long way without overwhelming your message.
10. Test and Optimise Post-Edit
Once your product demo is fully edited, don’t rush to publish it straight away. Take the time to test it with a small group of people who resemble your target audience. This step is crucial it gives you a chance to see how real viewers experience the demo before it goes live. Watch how they respond. Are they engaged from the start? Do they understand the key points? Can they clearly see what the product does and why it’s useful?
Ask specific questions like: “Was there any part that felt too fast or too slow?” or “Did anything confuse you?” Sometimes, what seems obvious to you as the creator might not land the same way with others. Pay close attention to any sections where viewers lose interest, seem unsure, or skip ahead. Their feedback can reveal small edits that make a big difference like trimming a repetitive section, adding a voiceover clarification, or adjusting the pacing of a key moment.
Also, take this opportunity to test technical details like sound balance, text readability, and mobile responsiveness. Does the demo look just as good on a phone as it does on a laptop? Is the call-to-action clear and clickable if included in a social media post? Optimising across platforms ensures your demo performs well wherever your audience finds it.
By testing thoughtfully and iterating with purpose, you’ll increase your chances of creating a product video that not only looks great but actually converts viewers into customers.
Final Thoughts: Turn Product Demos into Conversions
Product demos are your digital showroom. Make the most of them by planning every detail from script to sync. If you’re looking for professional support, Feel free to reach out to our demo video company to elevate your product content with professional, high-converting visuals.