

Live streaming can feel a bit like flying a plane.
When everything goes smoothly, it’s exhilarating and professional. But when things go wrong audio cuts out, the stream freezes, or your slides don’t load it can quickly become stressful. The secret to success isn’t fancy equipment or years of experience. It’s preparation. With the right pre-stream checklist, you can dramatically reduce the chances of technical issues, awkward pauses, or audience drop-off.
In this guide, I’ll walk you step by step through everything you need to check and prepare before going live so you can focus on delivering value and engaging your audience.
Why a Pre-Stream Checklist Matters
Even seasoned professionals rely on checklists and for good reason. When you’re live, there’s little room for error. A simple pre-stream checklist ensures you stay calm, focused, and in control no matter how complex your setup is.
Here’s why it’s worth taking 10 minutes to run through it:
- It keeps you calm and organised
Having a clear list to follow reduces stress and decision fatigue, especially in the moments leading up to going live. - It helps you catch issues early
Whether it’s a muted mic, a missing graphic, or the wrong stream key checking everything beforehand prevents surprises mid-broadcast. - It builds consistency
Following the same process every time ensures your streams meet a consistent quality standard, which builds trust with your audience.
A short, focused run-through before each session can save you hours of troubleshooting and help your live content look and feel more professional every time.
1. Confirm Your Internet Connection
Your internet connection is the backbone of your live stream. No matter how great your setup is, a poor connection can ruin the viewer experience with lag, buffering, or unexpected dropouts. That’s why it should be the first thing on your pre-stream checklist.
- Use a wired Ethernet connection whenever possible
Wired connections are far more stable and reliable than Wi-Fi, which is prone to interference, especially in crowded environments. - Test your upload speed
Your upload speed is what matters most for streaming. Aim for at least 5 Mbps for standard HD (720p), and ideally 10 Mbps or more if you’re streaming in 1080p or higher. - Have a backup connection
Keep a mobile hotspot or secondary network ready as a fail-safe. It may not offer perfect quality, but it can keep your stream alive in a pinch.
Taking a few minutes to check your connection can prevent major disruptions and ensure a smoother, more professional broadcast.
2. Check and Charge All Equipment
Few things derail a live stream faster than a dead battery or a missing cable. Taking the time to prepare your gear in advance can save you from frantic scrambles and mid-stream interruptions.
- Charge all cameras, microphones, and lights fully
Even if you think you have enough battery, it’s always best to start fully charged. Some devices lose power faster when streaming continuously. - Pack spare batteries and power banks
Having backups on hand ensures you’re not cut off mid-stream if something drains faster than expected. - Lay out every cable and adapter
Make sure you have all the necessary connections USB, HDMI, audio jacks, extension cords, and any converters your setup requires. - Label your gear
Especially if you’re working with multiple devices or team members, clear labelling helps speed up setup and troubleshooting.
Preparation here means less stress later and a much smoother live experience for both you and your viewers.
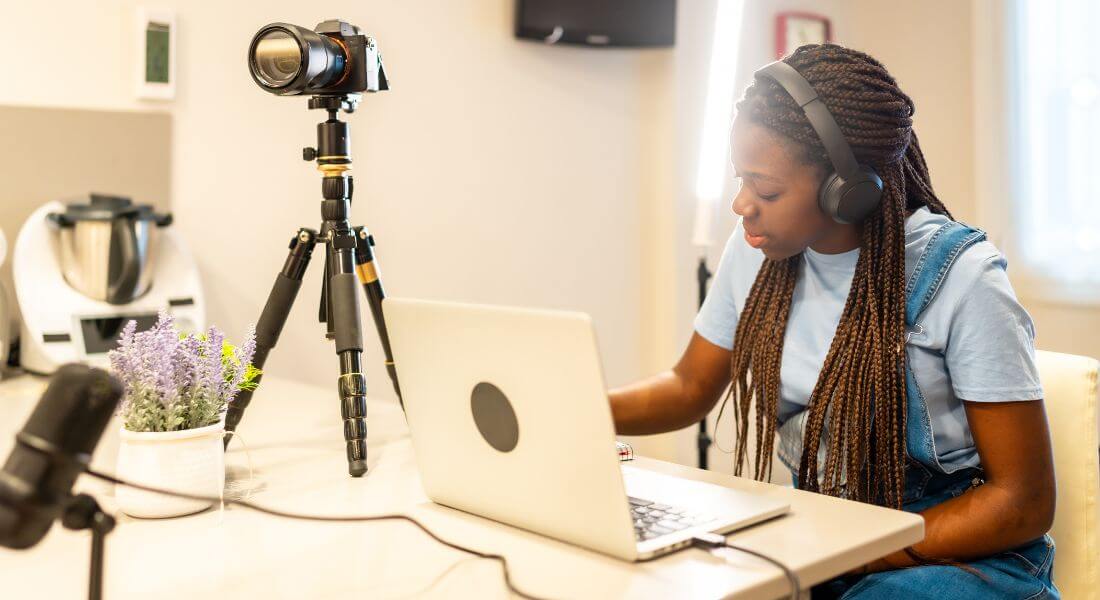
3. Set Up Your Cameras

A well-positioned camera can instantly elevate the quality of your stream and make your presentation feel more professional and engaging. Even basic tweaks can make a big visual difference.
- Position your camera at eye level
This creates a more natural connection with your audience and avoids awkward angles that look unflattering or distant. - Clean the lens
A quick wipe with a microfiber cloth can remove dust or smudges that dull the image. It’s a small step that has a big impact on visual clarity. - Check focus and framing
Make sure you’re in sharp focus and framed correctly ideally with your eyes about one-third from the top of the screen and some space around you. - Verify resolution and frame rate settings
Ensure your camera is set to the desired quality typically 720p or 1080p at 30fps for most professional-looking streams. Match your camera settings with your streaming software for best results.
Spending a few extra minutes here ensures you come across polished, prepared, and visually confident on camera.
4. Optimise Lighting
Even the most advanced camera can’t compensate for poor lighting. A well-lit scene helps you appear clearer, more professional, and more engaging to your audience without requiring expensive gear.
- Use soft, diffused light on your face
Aim for flattering, even lighting using a ring light, softbox, or natural light through a window. Soft light minimises harsh shadows and creates a welcoming look. - Avoid strong backlighting or overhead fluorescents
Bright light behind you can cause silhouetting, while overhead lights often create unflattering shadows under your eyes. - Check for unwanted shadows
Do a quick test to make sure your face and background are evenly lit. Adjust the position or angle of your lights if needed. - Balance light across your background
A well-lit background adds depth and polish. Use a secondary light or ambient room lighting to prevent it from looking dull or uneven.
Pro Tip:
If you’re relying on daylight, test your setup at the same time of day you plan to stream. Natural light shifts quickly, so what looks perfect at 10 a.m. might be totally different by 3 p.m.
5. Test Audio
Poor sound quality is one of the fastest ways to lose viewers. Even if your visuals are perfect, distorted, echoey, or inconsistent audio will make people tune out. That’s why testing your audio setup is a critical step before going live.
- Test your primary microphone for clarity and volume
Speak naturally and listen back to ensure your voice is clear, not muffled or too quiet. Adjust gain or mic positioning if needed. - Check backup audio sources
If you’re using a secondary mic, onboard camera audio, or a lavalier, test those too just in case you need to switch mid-stream. - Monitor levels in your streaming software
Watch your audio meters in OBS, Streamlabs, or whichever software you use. Make sure levels are steady not too low or peaking into the red zone. - Minimise background noise
Close windows, mute nearby devices, and turn off fans or air conditioners that might create hum. Every bit of silence improves the viewer experience.
Pro Tip:
Wear headphones during your test (and ideally during the stream) to catch subtle issues like buzzing, feedback, or echo that you might not hear otherwise.
6. Prepare Your Visual Assets
Scrambling to find graphics or slides during a live stream is stressful and looks unprofessional. Preparing your visual assets in advance helps everything flow smoothly and keeps your audience focused on your message.
- Load your slides or videos into your encoder
Whether you’re using OBS, Streamlabs, or another tool, make sure all media files are preloaded and tested within your scenes or sources. - Check image resolution and aspect ratio
Blurry or stretched visuals can be distracting. Use high-resolution files that match your stream’s aspect ratio (usually 16:9 for widescreen). - Prepare lower thirds and title cards
These help introduce speakers, segment your content, or add visual interest. Keep them branded and consistent with your overall look. - Have your logo and overlays ready to go
Branded elements like logos, social handles, or banners can add polish to your stream just make sure they’re non-intrusive and sized appropriately.
By having all your visuals prepped and queued, you’ll reduce live errors and deliver a more cohesive viewing experience.
7. Review Your Script or Run Sheet

Even if your stream has a relaxed, conversational tone, a clear plan keeps you focused and ensures your content flows smoothly. A brief script or run sheet helps you avoid awkward pauses, missed topics, or running over time.
- Outline your introduction, key points, and call to action
Know how you’ll open, what you need to cover, and what you want viewers to do by the end whether that’s subscribing, commenting, or checking out a link. - List any segments or guest appearances
If you’re bringing in guests, showing pre-recorded content, or switching between topics, list these in order so transitions are seamless. - Note the time allocated for each part
Keeping a rough timeline helps you stay within your scheduled duration and ensures each segment gets enough attention.
Having a written plan nearby gives you a solid structure to follow and frees up mental space so you can focus on engaging your audience.
8. Rehearse Transitions and Timing
Seamless transitions and well-paced segments make your live stream feel polished and intentional. Even a quick rehearsal can help you catch rough handoffs, awkward silences, or unexpected tech hiccups.
- Practice switching between camera angles or slides
If you’re using multiple scenes, overlays, or screen shares, run through the sequence so you know when and how to transition cleanly. - Time each segment to avoid overrunning
Keep an eye on the clock during rehearsal to make sure your content fits within the planned duration especially if you’re on a tight schedule or streaming to a live audience with expectations. - Test any pre-recorded videos or audio cues
Make sure embedded media plays correctly, with synced audio and smooth transitions back to your live feed. It’s better to catch glitches now than during the stream.
A short run-through adds a layer of confidence and helps everything feel more coordinated when you go live.
9. Verify Your Platform Settings
Before you go live, it’s crucial to review your streaming platform settings. Each platform YouTube, Facebook, LinkedIn, Twitch has its own interface, options, and quirks. A quick review ensures your stream reaches the right audience with the right setup.
- Confirm your stream key is correct
Entering the wrong key is a common mistake that prevents your stream from connecting. Double-check it matches your chosen platform and event. - Check privacy settings
Make sure your stream is set to public, private, or unlisted based on your goals. You don’t want to accidentally limit access or stream to the wrong audience. - Set your title, description, and tags
A clear, engaging title and description help attract viewers and set expectations. Use relevant tags or keywords to boost discoverability especially on platforms like YouTube. - Schedule your broadcast if needed
Scheduling your stream allows you to promote it ahead of time and build anticipation. Most platforms also allow you to set a custom thumbnail and countdown.
Pro Tip:
Always double-check your time zone settings when scheduling especially if your audience spans multiple regions. A mismatched start time can lead to confusion or missed viewers.
10. Enable Engagement Tools
Live streaming isn’t just about broadcasting it’s about connecting. Enabling interactive features encourages real-time engagement, keeps viewers involved, and builds a stronger sense of community around your content.
- Enable live chat or Q&A
Turn on your platform’s chat or Q&A features so viewers can ask questions, share feedback, or interact with each other during the stream. - Prepare polls or questions
Have a few pre-planned prompts ready to spark interaction. Polls, quick questions, or comment prompts can break the ice and keep your audience actively participating. - Assign a moderator if needed
If you’re expecting a high volume of comments or questions, appoint someone to help manage the chat. They can respond to common queries, highlight key questions, and filter out spam.
Engaged viewers are more likely to stay longer, share your content, and come back for future broadcasts so it’s worth taking the time to activate these tools before you go live.
11. Record a Test Stream
Before going live to your full audience, it’s smart to do a private test run. This gives you a chance to catch hidden issues with audio, video, or performance without the pressure of a public stream.
- Stream to a private channel
Set your stream to private or unlisted on platforms like YouTube or Facebook. This lets you test everything without alerting your followers. - Watch the video on a separate device
Monitor the stream from a viewer’s perspective to see how it looks and sounds in real time. Check for things like buffering, delays, or visual glitches. - Listen for audio glitches
Use headphones to catch background noise, mic pops, distortion, or echo that might not be obvious through speakers. - Check video smoothness and sync
Make sure your video feed is smooth, and that the audio stays in sync with your visuals. Lag or stuttering can make even great content hard to watch.
A quick 5–10 minute test can help you feel confident and prevent issues that might otherwise go unnoticed until it’s too late.
12. Prepare a Backup Plan

Even with the best preparation, tech issues can still happen. A solid backup plan ensures you can recover quickly and keep your stream running smoothly or at least minimise disruption if something goes wrong.
- Have a secondary recording device capturing locally
Use your phone, camera, or a separate recorder to capture your stream offline. If your stream fails, you’ll still have a copy to upload later. - Keep a backup microphone ready
If your primary mic dies or disconnects, having a plug-and-play USB mic or lapel mic nearby means you won’t be left in silence. - Print out key notes or scripts
In case your laptop crashes or your teleprompter fails, a printed run sheet or cue cards will help you stay on track without relying on screens. - Know how to quickly restart your encoder or switch platforms
Familiarise yourself with your streaming software so you can reboot quickly. Keep login details handy in case you need to reconnect to a different platform.
Pro Tip:
Create a “go bag” with extra batteries, cables, and adapters so when things go sideways, you’re ready to recover without panic.
13. Notify Your Audience
All the technical prep in the world won’t matter if no one knows you’re going live. Promoting your stream in advance builds anticipation, boosts turnout, and helps ensure viewers are ready and waiting when you start.
- Send reminder emails
Email your subscribers with the date, time, topic, and a direct link to the stream. Include a calendar invite or reminder option if possible. - Share links on social media
Post about your upcoming stream across all your channels Instagram, LinkedIn, Facebook, X (Twitter), etc. Don’t forget to include the platform, start time, and a reason to tune in. - Post countdowns or teaser clips
Short videos, countdown graphics, or behind-the-scenes snapshots can build excitement and keep your audience curious in the days or hours leading up to the stream.
A little promo goes a long way and ensures your well-prepared broadcast actually reaches the people it’s meant for.
14. Check Your On-Camera Appearance
A quick appearance check before you go live can make a big difference in how confident and polished you come across. It only takes a minute but helps ensure you look your best on screen.
- Adjust your clothing
Avoid busy patterns, harsh stripes, or overly reflective materials, which can be distracting or distort on camera. Solid, neutral colours often work best. - Tidy hair and makeup (if applicable)
Smooth out flyaways, blot shiny skin, or touch up makeup to reduce glare under lights. The goal is to look clean and camera-ready not overly styled. - Sit comfortably and adjust your posture
Good posture conveys confidence. Make sure your chair height is right, your shoulders are relaxed, and you’re positioned squarely in the frame.
This last-minute check ensures that the first impression you make is a strong and confident one.
15. Start Early
The final step in your pre-stream checklist? Give yourself a buffer. Logging in 15–30 minutes before you go live allows you to catch any last-minute issues and start your stream calm, collected, and in control.
- Test your connection again
Reconfirm your internet speed, audio levels, and camera feed. A final double-check can catch problems that cropped up since your last test. - Confirm all settings are saved
Ensure your stream key, privacy settings, overlays, and scene selections are locked in. Some platforms reset fields if the window is refreshed. - Take a few deep breaths you’ve got this!
Give yourself a moment to centre, hydrate, and shake off any nerves. You’ve done the prep now it’s time to shine.
Pro Tip:
If your platform allows, consider starting a 1–2 minute countdown before going live publicly. It builds anticipation and gives stragglers time to join.
Final Thought: Confidence Comes from Preparation
Live streaming success is 90% preparation and 10% delivery. With this checklist, you’ll feel confident and ready to engage your audience without last-minute stress. If you’d like help planning or executing your next broadcast, you can contact our live streaming company in London to take your content to the next level.