


The internet is packed with live streams. Some look like a polished TV broadcast. Others look… well, like someone talking into their webcam in a messy kitchen. If you want viewers to take your content seriously and keep watching you need to make your stream look and feel professional, even if you’re working with basic gear.
The good news? With a few smart choices about framing, lighting, audio, and background, you can transform your live stream from amateur to broadcast-quality. In this guide, I’ll walk you through everything you need to know to make your live streams stand out.
1. Start with a Tidy, Purposeful Background
Your background sets the tone for your entire live stream. It’s not just what your audience sees it also reflects your professionalism and attention to detail. A well-thought-out setup can instantly boost your credibility and keep viewers focused on your message.
- Declutter the space
Make sure your background is clean and free of any mess. Remove anything that might distract your audience, such as laundry, leftover food containers, or random personal items. A tidy space helps keep the focus on you and your content. - Choose a neutral or branded backdrop
Simple, solid-coloured walls often work best. You can also use branded banners, subtle patterns, or soft textures that align with your visual identity. If you’re representing a company, incorporating your logo or brand colours can create consistency across platforms. - Add a touch of visual interest
While keeping things clean, you can include one or two carefully chosen items that add depth and personality. A potted plant, a neatly arranged bookshelf, or a tasteful ornament can give your background a more dynamic and lived-in feel without stealing attention. - Avoid strong backlighting
Lighting plays a major role in how professional your stream looks. Sitting with a bright window or lamp behind you can turn you into a silhouette. Instead, position your main light source in front of you so your face is well-lit and clearly visible.
2. Position Your Camera Correctly
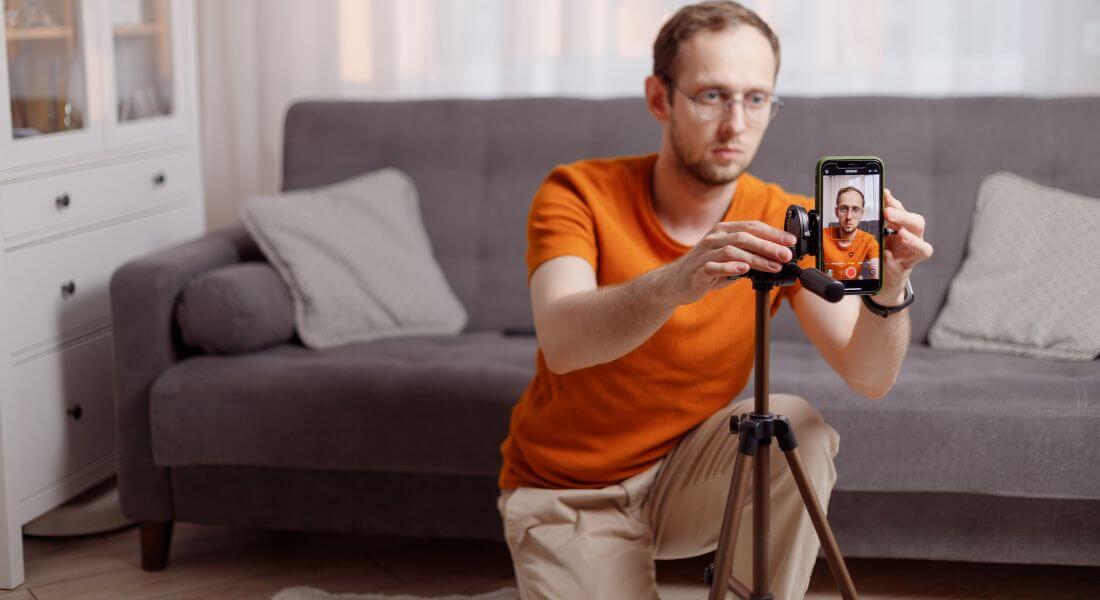
The way you position your camera can dramatically affect how polished and professional your stream appears. A poorly angled camera can be distracting or even off-putting, while a well-positioned one helps build trust and keeps viewers engaged.
- Keep the camera at eye level
Your lens should be directly in line with your eyes not above or below. You can use a tripod, laptop riser, or even stack some sturdy books to get the right height. Eye-level framing makes your presentation feel more personal and helps you maintain direct “eye contact” with your audience. - Avoid awkward angles
Steer clear of pointing the camera upwards (which can be unflattering and distracting) or angling it too far downward (which can make you look distant or disengaged). The goal is a natural, straight-on view that feels balanced and comfortable to watch. - Frame yourself with proper headroom
Make sure there’s a small amount of space roughly 10–15% of the frame above your head. Too much headroom can make you look small or lost in the frame, while too little can feel cramped and cut off. - Centre your face or use the rule of thirds
You don’t always need to be smack in the middle of the shot. Placing yourself slightly off-centre can create a more dynamic, visually appealing composition. The “rule of thirds” suggests placing key visual elements a third of the way into the frame, which often feels more natural and cinematic.
3. Use Good Lighting (Even on a Budget)
Lighting can make or break the visual quality of your live stream. Even if you’re working with minimal equipment, thoughtful lighting can instantly elevate your appearance and make your setup feel more professional.
- Make the most of natural light
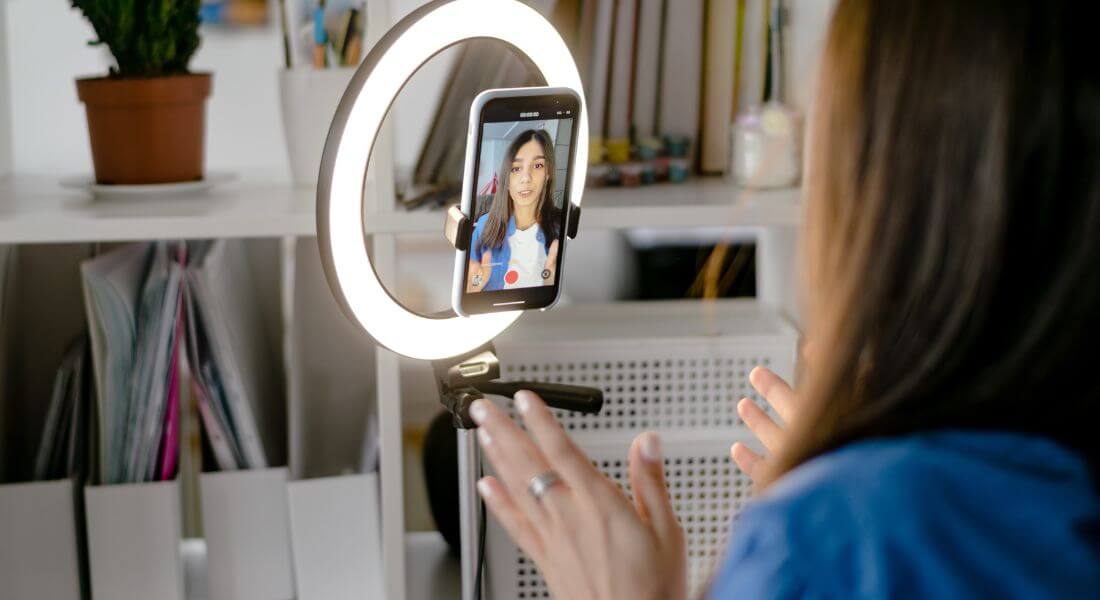
One of the easiest and most flattering light sources is daylight. Position yourself so you’re facing a window during the day this provides soft, even light that brightens your face and makes you look more vibrant. Avoid having the window behind you, as it can create a silhouette effect. - Consider affordable ring lights or LED panels
You don’t need a high-end lighting rig to look great on camera. Budget-friendly ring lights or compact LED panels are widely available and can dramatically improve your setup. These lights are designed to produce soft, flattering illumination and are easy to adjust for brightness and tone. - Avoid relying on harsh overhead lights
Ceiling lights, especially in offices or homes, often cast shadows under the eyes or chin, making you appear tired or less engaging. Instead, opt for light sources at eye level that highlight your face evenly without creating unflattering shadows. - Ensure consistent lighting in your frame
Pay attention to the balance between foreground and background lighting. Your face should be the brightest element in the frame, not the background. If the space behind you is overlit, it can pull focus away from you or make your image appear washed out.
4. Upgrade Your Audio

When it comes to livestreams, sound quality is arguably more important than video quality. Viewers will tolerate a slightly grainy image but if your audio is crackly, muffled, or full of background noise, they’ll quickly lose interest or click away.
- Invest in an external microphone
Built-in laptop or webcam microphones often produce tinny, low-quality sound. Switching to an external mic can make a huge difference. USB microphones like the Blue Yeti or Samson Meteor offer great sound quality for the price. Alternatively, a clip-on lavalier mic is discreet and perfect for hands-free speaking. Even budget models are a significant step up from default audio. - Test your audio levels before going live
Do a quick test recording or stream privately to check how you sound. Speak at your normal volume and listen back for distortion or inconsistent volume. Adjust your gain settings so your voice is clear and doesn’t “clip” (a sharp, unpleasant sound when audio levels peak too high). - Minimise background noise
A quiet environment makes a world of difference. Close windows and doors, put your phone on silent, and pause any apps that may ping or chime mid-stream. If you’re in a noisy area or have echoey acoustics, consider using software with built-in noise suppression or third-party plugins to clean up your audio in real time.
5. Choose the Right Resolution and Bitrate
A clear, crisp image helps your stream look professional and keeps viewers engaged. Choosing the correct resolution and bitrate ensures your video looks good without causing buffering or lag especially important if you’re streaming live.
- Use at least 720p or 1080p resolution
In today’s digital landscape, viewers expect decent video clarity. While 720p (HD) is the minimum acceptable standard, aiming for 1080p (Full HD) will make your content look more polished and professional. Most modern webcams and smartphones can handle 1080p, so it’s worth enabling if your system allows it. - Follow bitrate recommendations based on your resolution
Bitrate determines how much data is transmitted per second during your stream higher bitrates mean better image quality but require a faster internet connection.
Recommended settings: - For 720p, use a bitrate between 2,500 and 4,000 kbps
- For 1080p, aim for 4,500 to 6,000 kbps
- Test your internet upload speed before going live
A smooth stream depends on having sufficient upload bandwidth. Run a speed test to confirm that your connection can support your chosen bitrate. As a rule of thumb, your upload speed should be at least 1.5x your stream’s bitrate to allow for stability and fluctuations during the broadcast.
6. Plan Camera Angles (and Multi-Cam Switching)
Adding variety to your visuals doesn’t require a full studio setup. Even just one additional camera angle can make your livestream feel more dynamic, professional, and engaging especially during demonstrations, interviews, or longer broadcasts.
- Set up a secondary camera for variety
If possible, connect a second camera and position it at a different angle perhaps slightly off to the side, overhead, or focused on a product or workspace. This creates a more cinematic experience for your viewers and helps break up long periods of static framing. - Use switching tools to toggle between views
Software like OBS Studio (free and open-source) or vMix (a professional-grade option) allows you to switch between camera feeds at the press of a button. These tools make it easy to transition smoothly between different angles without interrupting your flow. - Preview each camera before going live
Always check the focus, exposure, and framing of every connected camera. Test your angles ahead of time to avoid surprises like a blurry feed or poor lighting once you’re live. Most switching software includes a preview function so you can see what’s coming up next before pushing it live.
7. Use Branded Visuals
Consistent branding helps your livestream feel polished, professional, and instantly recognisable. Even small touches like your logo or branded text can make a big difference in how viewers perceive your content.
- Add lower thirds for clarity and professionalism
Lower thirds are text graphics that appear at the bottom of the screen usually to introduce speakers, display job titles, or highlight a topic. They help viewers stay oriented and add a broadcast-quality feel to your stream. Keep them simple and easy to read. - Include subtle logo overlays
Adding your logo in a corner of the screen keeps your brand present without being intrusive. It’s a great way to reinforce your identity, especially if your content is shared or clipped later on. Just make sure it doesn’t distract from your main content. - Use on-screen graphics to highlight key points
Incorporate banners, bullet points, call-outs, or icons to visually reinforce important messages. These graphics should support what you’re saying, not compete with it. Keep animations smooth and design elements aligned with your brand colours and style for a cohesive look.
8. Check Your Internet Connection
Even with a great setup, poor internet can ruin a livestream in seconds. Lag, buffering, or sudden disconnects are frustrating for viewers and can undermine your message so it’s worth taking time to ensure your connection is rock-solid.
- Use a wired Ethernet connection whenever possible
While Wi-Fi is convenient, it’s also prone to interference and signal drops especially if others are using the same network. A direct Ethernet connection provides a more stable and reliable link, which is essential for maintaining a consistent stream. - Test your upload speed in advance
Before you go live, use an online speed test to check your upload rate. You should aim for an upload speed at least twice the bitrate of your intended stream. For example, if you’re streaming at 4,000 kbps, your upload speed should be at least 8 Mbps to allow for fluctuations. - Have a backup plan ready
Technology can be unpredictable, so it’s smart to prepare a fallback. A mobile 4G or 5G hotspot can serve as an emergency backup if your primary internet goes down. Test it in advance to make sure it provides sufficient upload speed for your needs.
9. Prepare a Run Sheet
Even if your delivery is casual, the most professional-looking livestreams are rarely improvised. A simple run sheet (or show flow) helps keep you organised, ensures a smooth experience for viewers, and gives you the confidence to stay on track from start to finish.
- Start with a clear intro
Begin by welcoming your audience and letting them know what the stream is about. A quick preview of what’s coming up helps set expectations and keeps viewers engaged from the start. Mention the topic, any special guests, and how long the stream will run. - Break content into clear segments
Divide your stream into manageable parts whether it’s different topics, product demos, interviews, or Q&A sections. This structure keeps the pace flowing and makes it easier for viewers to follow along. If you’re using visuals or switching cameras, plan those transitions in advance too. - Plan your calls to action
Don’t leave engagement to chance. Think about when you’ll ask viewers to like, comment, share, subscribe, or visit your website. Placing these calls to action at natural points in the stream (e.g., after a key tip or before closing) makes them feel seamless and effective. - End with a strong outro
Finish your stream with confidence. Thank your viewers for joining, summarise key takeaways if needed, and let them know what to expect next whether it’s a future stream, a downloadable resource, or how they can stay in touch with you or your brand.
10. Rehearse
Even if you’re confident in your content, taking time to rehearse can make all the difference. A practice run helps you spot technical glitches, smooth out transitions, and deliver your message with clarity and confidence.
- Test all your equipment
Before going live, check that everything is working as expected your cameras, microphones, lighting, and internet connection. Make sure your audio is clear, your visuals are sharp, and your lighting flatters your setup. It’s much easier to fix issues beforehand than during a live stream. - Walk through your transitions
If your stream includes switching scenes, showing slides, playing video clips, or using overlays, rehearse how and when you’ll do each one. Familiarity with your streaming software like OBS, StreamYard, or vMix ensures your transitions are smooth and don’t disrupt the flow. - Time your content realistically
Do a full run-through to make sure your stream fits within the intended timeframe. This helps you avoid rushing important sections or dragging out others. It also gives you a better sense of where to pause, engage the audience, or insert calls to action.
11. Engage Your Audience
A polished livestream isn’t just about looking good it’s about creating a two-way experience. When you actively involve your viewers, your stream becomes more memorable, more human, and more likely to keep people watching.
- Acknowledge comments and viewers
Take time to respond to questions or shout out viewer names when appropriate. A simple “Thanks for the great question, Sarah!” or “Welcome to everyone just joining!” makes your audience feel seen and valued. This small touch builds a stronger connection and encourages others to participate too. - Incorporate interactive features like polls or Q&A
Use the tools available on your platform to get your viewers involved. Ask them to vote on a topic, share opinions in the chat, or drop questions for you to answer live. This kind of real-time interaction keeps people engaged and makes your stream feel more dynamic and responsive. - Stay present and engaged yourself
Try to avoid reading off scripts or staring at another screen for too long. Your energy and presence set the tone, so make eye contact with the camera, smile, and speak naturally. Even small things like nodding or reacting to the chat in real time help you feel more approachable and relatable.
12. Record Your Stream
Recording your livestream isn’t just a backup it’s a smart way to get more value from your effort. Whether for future marketing, content creation, or analysis, having a high-quality recording allows you to maximise the impact of your stream long after it ends.
- Repurpose content for social media
Once your stream is over, you can clip highlights, quotes, or behind-the-scenes moments to share across platforms like Instagram, LinkedIn, X (Twitter), or TikTok. It’s a great way to reach people who didn’t tune in live and keep the conversation going. - Review your performance
Watching your stream back helps you identify what worked and what could be improved. You’ll get a better sense of your pacing, audience engagement, transitions, and technical quality valuable insights for making your next livestream even better. - Share with those who couldn’t attend
Not everyone can join you live. Having a recording allows you to send the full stream to clients, colleagues, or viewers who missed it. You can also host the video on your website, YouTube, or an internal platform for on-demand access.
13. Evaluate and Improve
Your work doesn’t end when the livestream does. Taking time to evaluate your performance helps you grow, refine your process, and deliver even better results next time. Think of each stream as a stepping stone toward more confident and professional broadcasts.
- Assess video and audio quality
Watch the recording with fresh eyes and ears. Was the picture clear and well-lit? Was your voice easy to hear, or were there distracting sounds? Note any technical issues that need fixing like microphone pops, lag, or camera positioning. - Review timing and flow
Did the stream feel rushed or drag in certain places? Was the structure smooth and easy to follow? Timing can make a huge difference in viewer retention, so look for moments where you can tighten up your delivery or slow down for clarity. - Analyse viewer engagement
Check how many people watched, when they joined or dropped off, and how actively they participated in the chat or polls. Engagement metrics offer useful clues about what content resonated and where you might improve interactivity or clarity. - Make a quick improvement list
After reviewing everything, jot down a simple list: what worked well, what could be better, and what you’ll do differently next time. Keeping track of lessons learned makes each new stream smoother, more impactful, and more enjoyable for both you and your audience.
Final Thought: Professional Streams Start with Preparation
Making your live streams look and feel professional doesn’t mean spending a fortune. A little preparation good framing, clear audio, tidy backgrounds, and branded visuals goes a long way. Want your next broadcast to feel seamless and professional? Our live streaming company in London is here to help you make it happen.