


If you’re editing interview or talking-head videos, you’ve probably found yourself thinking, “How do I make this look more engaging without investing hours of my time or mastering complex motion graphics software?”
The good news? It’s absolutely possible to enhance your videos with professional-looking animated elements like dynamic subtitles, lower-thirds, on-screen emoji reactions, pop-up stats, animated icons, and more without a steep learning curve. These animations can help you highlight key messages, add personality, reinforce ideas visually, and maintain viewer attention throughout the video.
And the best part? You don’t need to be a seasoned motion designer or own expensive software to do it. Whether you’re editing in industry-standard tools like Adobe Premiere Pro or exploring free, user-friendly platforms like Canva, CapCut, or DaVinci Resolve, there are plenty of fast and effective ways to breathe life into your footage.
In this guide, we’ll walk you through simple techniques, clever shortcuts, and smart tools that can transform your interview content from static to standout without the overwhelm. Let’s break it all down.
Why Add Animated Graphics to Interviews?
Interviews and talking-head videos are packed with valuable content but visually, they can sometimes feel a bit static or repetitive. That’s where animated graphics come in. They add energy, guide the viewer’s focus, and make the viewing experience far more engaging.
Here’s how animation helps enhance your talking-head content:
• Emphasising key points visually – Motion graphics like pop-up text, icons, or highlights can draw attention to specific phrases or statistics, reinforcing the message for viewers.
• Keeping the viewer’s attention – Subtle animation elements prevent visual fatigue. A moving element every few seconds gives the eye something new to process, which helps retain interest, especially in longer videos.
• Breaking monotony with movement – Even simple animations like slide-ins or fade-ins for names and titles add a layer of visual variety, breaking up the sameness of a single static shot.
• Making your content feel more modern and branded – Custom colour palettes, logo animations, and consistent typography can align your visuals with your brand identity, giving your video a polished, professional feel.
Whether you’re producing a YouTube Q&A, a customer testimonial, a team introduction, or a corporate interview, even a few motion cues can make a noticeable difference. These subtle enhancements keep your content looking fresh, viewer-friendly, and well worth watching.
Common Graphics to Include
When editing talking-head or interview-style videos, incorporating animated graphics can dramatically improve the quality and impact of your content. These visual elements do more than just decorate your footage they help communicate ideas, reinforce messages, and hold the viewer’s attention.
Well-placed graphics can transform a static interview into an engaging visual story. Whether you’re creating content for YouTube, LinkedIn, internal communications, or marketing campaigns, these are the most commonly used animated graphics that can give your videos a professional edge:
• Lower-thirds
These are the animated name and title bars that typically appear in the bottom third of the screen. They’re used to introduce speakers, showcase credentials, and identify job roles or locations. Customising your lower-thirds with consistent brand colours, logos, and typography can instantly make your content feel more cohesive and well-designed. They also help viewers connect with the speaker on a personal level by giving quick context without interrupting the flow of conversation.
• Subtitles or captions
Whether they’re burned-in (hardcoded onto the video) or dynamically animated with style, captions are essential for making your videos accessible and engaging. They allow viewers to follow along without sound, which is especially important for social media platforms where many users watch with the volume off. Animated captions with subtle fades, kinetic text, or bouncing highlights can also help emphasise important phrases and improve comprehension.
• Emojis or reactions
A well-timed animated emoji (like a laughing face, heart, thumbs up, or shocked expression) can inject personality, humour, and emotion into your video. These are especially useful in informal or conversational content, such as influencer interviews, behind-the-scenes footage, or creator Q&As. Reactions help break the monotony and create a sense of connection between the speaker and the audience.
• Data callouts
These animated text or graphic overlays highlight key information such as statistics, quotes, facts, or numbers. They’re typically used in corporate videos, case studies, educational content, or testimonial interviews to reinforce what the speaker is saying. By visualising data through motion, you make it easier for viewers to absorb and retain the information.
• B-roll labels
When cutting away from the main speaker to supplementary footage (known as B-roll), it’s helpful to add context through animated labels, arrows, or short descriptors. These overlays explain what’s being shown whether it’s a location, a product in use, or background visuals that support the interview topic. They’re commonly used in explainer videos, training content, and documentaries to keep the narrative clear.
The key with all these graphics is to use them intentionally. You don’t need flashy, over-the-top animations often, simple and clean motion can be more effective. By choosing the right graphic for the moment and keeping it aligned with your brand, you can boost engagement, improve understanding, and make your videos look far more polished with minimal effort.
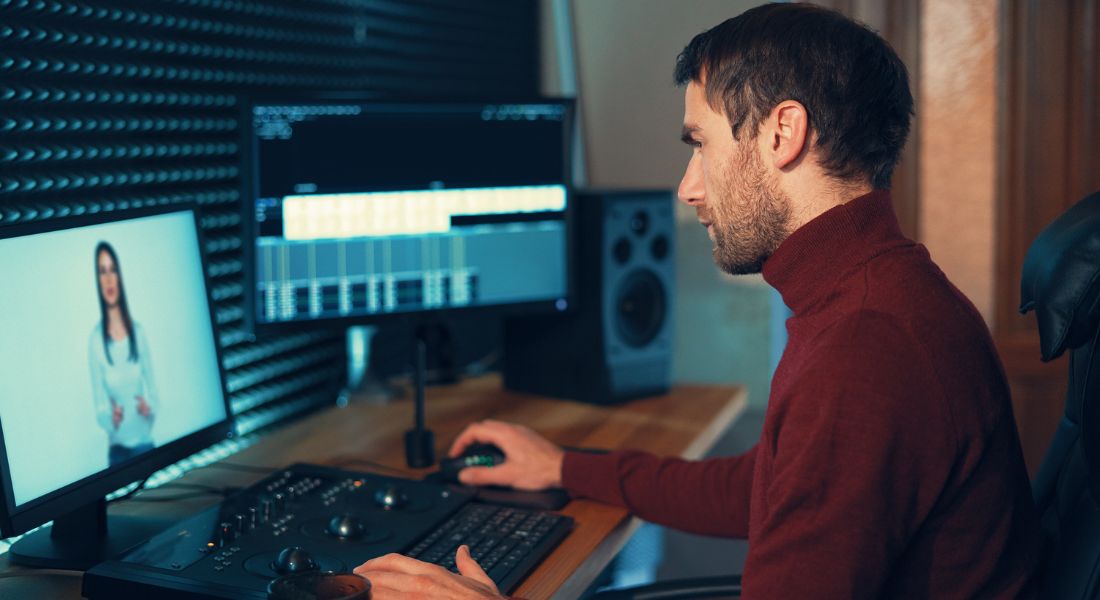
Option 1: Using Premiere Pro
Best For: Intermediate users who want full creative control and professional-level results
Adobe Premiere Pro is a powerful editing tool with robust support for animated graphics, making it an excellent choice if you’re comfortable with a more hands-on workflow. One of its standout features is the Essential Graphics panel, which gives you easy access to pre-designed templates as well as the flexibility to create your own from scratch.
Quick Workflow to Add Graphics in Premiere Pro:
- Open the Essential Graphics panel
Navigate to Window > Essential Graphics to access Adobe’s dedicated workspace for motion graphics. - Browse or import templates
You can use pre-made motion graphic templates (MOGRTs) available directly from Adobe Stock, or import your own. These include lower-thirds, captions, data boxes, callouts, and more. - Drag and drop into your timeline
Once you’ve chosen a graphic, simply drag it into your timeline on a video track above your footage. - Customise to match your brand
Use the editing options in the Essential Graphics panel to adjust text, font style, colour schemes, sizes, and basic animations like fade-ins or slide-ins.
You can go beyond templates by using keyframes to create custom motion such as making graphics slide in from the side, bounce, fade, or zoom.
Time-Saving Tip:
If you find yourself using the same style of graphics regularly such as branded lower-thirds or title sequences you can save time by saving those elements as custom templates or presets. You can also create nested sequences to easily reuse or update grouped graphics across multiple projects.
With a little upfront setup, Premiere Pro can help you build a reusable graphics library that gives your videos a consistent, professional look without starting from scratch each time.
Option 2: Using After Effects Templates
Best For: Stylised, high-quality animation with less manual setup
If you’re looking to add slick, professional-looking graphics like animated titles, infographics, or stylish lower-thirds, Adobe After Effects is a great tool to use especially when working with prebuilt templates. While the software itself is powerful and flexible, you don’t need to be a motion design expert to get impressive results. Templates allow you to skip the complex animation work and focus on simple customisation.
Workflow:
- Purchase or download a Motion Graphics Template (MOGRT)
Browse popular sites like Motion Array, Envato Elements, or Adobe Stock to find a template that suits your project’s tone and style. - Edit text, colours, and timing
Open the template in After Effects and replace the placeholder content with your own. You can usually adjust text, fonts, colour schemes, and animation timing directly in the control panel provided. - Export your finished animation
When you’re done, either export it as a MOGRT file (for use in Premiere Pro) or render a transparent .MOV (QuickTime format with alpha channel) so you can import it into tools like DaVinci Resolve or Final Cut Pro.
These templates can save a huge amount of time and give your videos a polished, broadcast-quality look without the need to animate everything from scratch.
Option 3: Free Tools (Canva & DaVinci Resolve)
Best For: Beginners or creators working on a tight budget
If you don’t have access to Adobe Creative Cloud or simply prefer tools that are free or more beginner-friendly there are still plenty of ways to add animated graphics to your videos without compromising on quality. Tools like Canva and DaVinci Resolve offer surprisingly powerful features for creating and customising motion graphics, even if you’re just starting out.
Canva (Free & Pro Versions)
Canva is ideal for quick, visually appealing graphics with minimal effort. While the free version offers basic features, the Pro version unlocks powerful export options that are especially useful for video editors.
- Use animated templates for lower-thirds, captions, stickers, and social callouts
- Easily customise fonts, colours, and layout with Canva’s drag-and-drop editor
- Export as MP4 for simple use in your timeline, or as transparent MOVs (Pro only) if you want overlays without a background
- Just drag the exported file into your video editor whether you’re using Resolve, Premiere, Final Cut, or any other platform
Canva’s user-friendly interface makes it perfect for non-designers who still want stylish, on-brand motion elements.
DaVinci Resolve + Fusion
DaVinci Resolve is a professional-grade video editor that’s completely free, and it includes a built-in motion graphics engine called Fusion.
Fusion allows you to:
- Animate text, shapes, and icons with keyframes or expressions
- Add motion tracking to attach graphics to moving elements in your footage
- Create 3D titles, glowing effects, and other cinematic touches
- Build your own templates or use Resolve’s built-in animated lower-thirds, available directly in the “Edit” tab for drag-and-drop simplicity
While Fusion has a bit of a learning curve, even basic animations like slide-ins, fades, and pop-up labels are very achievable and completely free.
Bonus Tools and Shortcuts
In addition to the major editing platforms like Premiere Pro, After Effects, and DaVinci Resolve, there are plenty of smaller tools and creative utilities that can help you add polish, motion, and professional flair to your talking-head or interview videos without requiring deep technical knowledge or expensive software. These tools are especially useful for content creators, marketers, podcasters, and small teams who want to speed up production while keeping content visually engaging.
Here are a few standout options to consider:
• CapCut
Available on both mobile and desktop, CapCut has become a go-to video editing app for creators working on social-first content. It’s intuitive, user-friendly, and packed with smart features like auto-captioning, animated text presets, dynamic stickers, filters, and transitions. All edits are made through simple drag-and-drop gestures, making it perfect for quick video turnarounds even if you’ve never edited before. Whether you’re cutting together Instagram Reels, TikToks, YouTube Shorts, or testimonial snippets, CapCut offers just enough animation tools to make your content feel modern and polished without overwhelming you.
• Descript
Descript is a game-changer for anyone working with dialogue-heavy content, such as interviews, podcasts, or video essays. This hybrid tool combines AI-powered transcription with text-based video editing, allowing you to edit footage simply by editing the transcript. It also supports features like animated word-by-word captions, highlight reel generation, screen recordings, and AI voiceovers. For those working with remote recordings or long-form audio-video content, Descript streamlines the process and removes the need to manually sync captions or edit audio in a timeline.
• LottieFiles
If you want to add animated visuals that feel custom and lightweight, LottieFiles is a brilliant resource. It offers a huge library of JSON-based vector animations that scale beautifully and retain quality across devices. While often used by developers and UI designers, these animations can be downloaded as MP4, MOV, or GIF files and easily overlaid in interview footage to highlight ideas, stats, or reactions. They’re ideal for creating motion-enhanced branding elements or micro-interactions in your video without adding bulk to your file size.
• Streamlabs / OBS Studio
Originally developed for live streaming, both Streamlabs and OBS Studio are powerful platforms that let you layer animated graphics in real-time or during pre-recorded sessions. This makes them great for producing podcasts with live visual elements, talking-head videos with overlays, or interviews with dynamic branding frames. You can import animated lower-thirds, social handle alerts, or interactive visuals to enhance the viewing experience without doing all the work in post. OBS is open-source and free, while Streamlabs offers additional user-friendly templates and integrations.
These bonus tools don’t require a full-scale production setup or professional training to use. They’re designed to be accessible, efficient, and creatively flexible perfect for creators who want to increase production value without increasing complexity.
Time-Saving Tips for All Platforms
Whether you’re editing in Premiere Pro, Canva, Resolve, or even mobile apps like CapCut, working smart can save you hours in post-production. These simple tips apply across platforms and help streamline your workflow especially when producing multiple videos or working to tight deadlines.
• Use templates don’t reinvent every time
Start with pre-made templates for lower-thirds, titles, and captions. Customise them once with your branding and reuse them across projects. This not only ensures consistency but also cuts down on repetitive tasks.
• Batch-create subtitles using transcription tools
Tools like Otter.ai, Descript, or YouTube Studio’s auto-caption feature can transcribe your dialogue automatically. You can then style the captions and animate them in your editor without manually typing every word.
• Group and label your graphic layers clearly
Keep your timeline and layer stack organised. Name your text, icons, and shape layers descriptively especially in tools like After Effects or Resolve. This makes it easier to make changes later and speeds up collaboration if you’re handing the project to someone else.
• Reuse style presets to maintain branding across videos
Create or save presets for text styles, transitions, and colour schemes. This not only maintains a consistent look across all your content but also helps you apply your brand visuals in just a few clicks.
By setting up reusable assets and keeping your workflow clean, you’ll save time without cutting corners on quality.
Final Thought: Ready to Level Up Your Video Graphics?
You don’t need to be a VFX artist to add animation to talking-head videos. With smart templates, intuitive software, and a few workflow tweaks, you can boost quality and engagement in minutes.
You can contact our animation company in London to take your content to the next level. We’ll help you create custom graphics and seamless workflows to make your videos shine.