

Ever watched Who Framed Roger Rabbit? and thought, “How on earth did they pull that off?” Decades later, the fusion of live-action performances with animated characters still feels like a technical marvel. There’s something timelessly magical about seeing cartoon characters convincingly interact with real people and physical environments especially when it’s done without modern CGI shortcuts. What’s even more exciting? You don’t need a Hollywood-sized budget or a massive VFX team to start experimenting with the same effect.
With a combination of clever planning, practical tricks, and smart post-production techniques, today’s indie filmmakers, content creators, and motion designers can achieve that same seamless blend. From using stand-ins on set for eye lines to matching lighting between real and animated elements, it’s all about attention to detail and knowing where animation meets reality. This isn’t just about technical know-how it’s about creating a believable world where your audience forgets the boundaries between drawn and flesh-and-blood characters.
In this guide, I’ll walk you through the essential techniques that bring this hybrid illusion to life. We’ll cover everything from on-set camera setups and physical props to animation principles like rotoscoping and shadow integration. Whether you’re shooting a quirky short film, designing a commercial, or working on an experimental music video, this is your step-by-step roadmap to achieving Roger Rabbit-level realism and bringing your animated characters to life in the real world.
Why This Technique Still Matters

Blending animation with live-action actors isn’t just a nostalgic nod to films like Roger Rabbit it’s still a highly relevant and powerful technique in today’s visual storytelling. Whether you’re making a commercial, a short film, or a YouTube series, this hybrid approach opens up creative possibilities that simply aren’t achievable with live action alone.
Here’s why it still packs a punch:
- You can add characters or elements that don’t exist in the real world.
Want a talking animal, a shape-shifting mascot, or an abstract idea brought to life? Animation lets you break the rules of physics and logic. It’s perfect for introducing fantasy, whimsy, or exaggerated personalities without the need for elaborate props or expensive practical effects. - It elevates your storytelling with surreal or stylised visuals.
Sometimes, reality just doesn’t cut it. Whether you’re aiming for comedy, drama, or something experimental, animated elements can make your story more emotionally expressive or visually striking. They give you the freedom to bend reality in ways that deepen your message or theme. - It creates memorable branded content, music videos, or explainer videos.
This technique is especially popular in marketing and entertainment. A human character interacting with animated graphics or mascots can be more engaging than standard talking-head content. It draws in audiences, increases watch time, and makes your content stand out in a crowded digital space.
And here’s the best part: thanks to modern software, camera tech, and motion tracking tools, this type of production is more accessible than ever. You don’t need a massive animation team or cutting-edge hardware. With the right workflow and some planning you can produce polished results from a home studio or small set. The magic of Roger Rabbit might have started in the ’80s, but its impact continues to evolve with today’s creators.
Step 1: Start with a Detailed Storyboard
Before you even think about rolling a camera, start by mapping everything out with a clear, detailed storyboard. When you’re blending animation with live-action, planning isn’t optional it’s essential. A good storyboard acts as your visual blueprint, helping both your camera crew and animators stay aligned throughout the production process.
Think about:
- Where will the animated character appear in each scene?
Will they walk alongside a live actor, sit at a table, or pop in and out of frame? Their positioning directly affects how you frame your shots and block your actors. - How will they move and interact with the real world?
Are they shaking hands with someone? Picking up an object? Hiding behind a door? Every physical interaction must be planned so the timing and placement feel natural on screen. - What tone or animation style are you going for?
Will your character be exaggerated and cartoonish, or more grounded and realistic? The tone affects everything from how the actors react to them, to how the scene is lit and shot.
Your storyboard should also include practical notes, such as:
- Camera angles and movement – Lock-off shots are easier to work with, but if the camera moves, you’ll need to match that motion in post.
- Scene timing – Knowing when a character enters, exits, or interacts helps animators sync their frames to the live-action.
- Interaction markers – Mark where the actor should look, gesture, or pause for a believable animated reaction later.
Storyboarding takes time, but it pays off in smoother production and fewer surprises during editing. The more specific you are now, the more polished your final blend will feel.
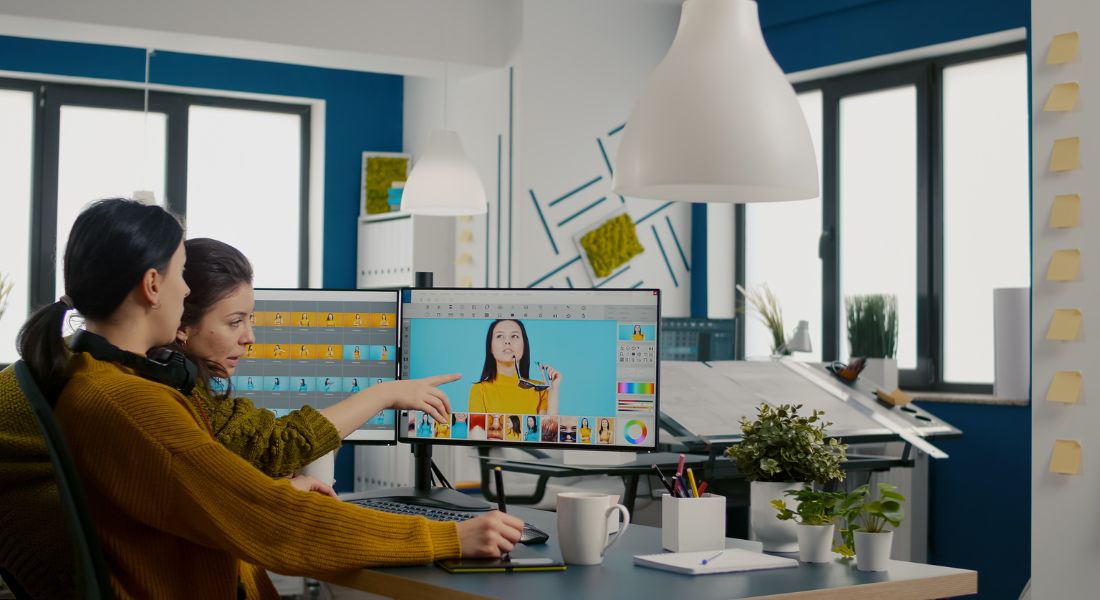
Step 2: Use Stand-Ins and Eye Lines
If your actor is meant to look at, speak to, or touch an animated character, you’ll need some kind of visual reference on set. Without it, performances can feel vague or misaligned and that can break the illusion when you add animation later. Stand-ins help your actors stay grounded and maintain accurate eye lines and gestures.
Try These Stand-In Hacks:
- Cardboard cutout or foam dummy
These help establish the height, size, and position of the animated character. They’re especially useful for scenes where the character stands or sits next to a live actor. - Tennis ball on a stick
A tried-and-tested method for keeping eye lines consistent. It’s simple but effective especially for floating or moving characters. - A friend in a green suit (optional)
If your character is moving a lot or physically interacting with the actor, a human stand-in can help sell the moment. This can be used as a reference or even for rotoscoping if needed.
Also, make sure to mark interaction spots clearly using tape, chalk, or small props. If your actor needs to touch or react to something like handing over an object or looking directly into the character’s eyes those markers help keep everything accurate and consistent across takes.
These small steps make a big difference when it’s time to animate, helping your live footage and animation blend more seamlessly.
Step 3: Match Lighting Between Worlds
Seamless integration between live-action and animation relies heavily on consistent lighting. Even if your animation is perfect, mismatched lighting will instantly make it feel fake or out of place. That’s why it’s important to make sure both worlds the real and the animated share the same lighting conditions.
On Set:
Capture reference materials during the shoot to guide your lighting in post:
- Reference sphere (half chrome, half grey):
This simple tool helps capture both light reflection and intensity. Use it in the same lighting setup as your scene so animators can replicate how light behaves in that environment. - HDRI photos of the set:
Take high-dynamic-range images of your filming space to record the lighting from every direction. These are especially useful if you’re working with 3D animation or reflective surfaces. - Clean plates:
Always shoot a version of your scene without actors or props. These clean plates are useful during compositing to place your animated character naturally into the background.
In Animation:
When you move to the animation stage, match the lighting as closely as possible:
- Same direction, temperature, and intensity:
Make sure the animated lighting lines up with the real-world sources. For example, if light is coming from the right in your footage, the same should apply to your animated character. - Add ambient occlusion and contact shadows:
These small touches help ground the character in the scene. Ambient occlusion adds subtle shading in corners and creases, while contact shadows make the character feel like it’s actually touching the floor or other surfaces.
Getting the lighting right is key to making your animation feel like it truly belongs in the live-action world.
Step 4: Use Camera Tracking or Match-Moving
If your camera stays still, compositing animated characters is much simpler. But as soon as the camera moves whether it pans, tilts, or handheld shakes you’ll need to use camera tracking (also called match-moving). This ensures your animated character moves naturally within the same 3D space as your live-action footage.
Without tracking, your character will just “float” on top of the video instead of feeling like part of the scene. Proper tracking locks the animation into your footage, so both elements share the same perspective and depth.
Tools for the Job:
- Blender
A powerful, free 3D software that includes solid camera tracking and compositing tools. Ideal for indie creators or anyone working on a budget. - After Effects with Mocha AE
Great for 2D and planar tracking. Mocha AE (bundled with After Effects) is perfect for tracking flat surfaces like walls, signs, or tabletops. - PFTrack or SynthEyes
These are professional-level tracking tools for more complex shots or projects that need high precision. They’re often used in film and VFX pipelines.
Once tracking is complete, export the tracking data and import it into your animation or compositing software. This allows your animated character to follow the exact same motion path as the real camera, making the final shot feel completely integrated.
Even subtle camera moves need to be matched. Taking the time to track properly will make your hybrid footage look polished and professional.
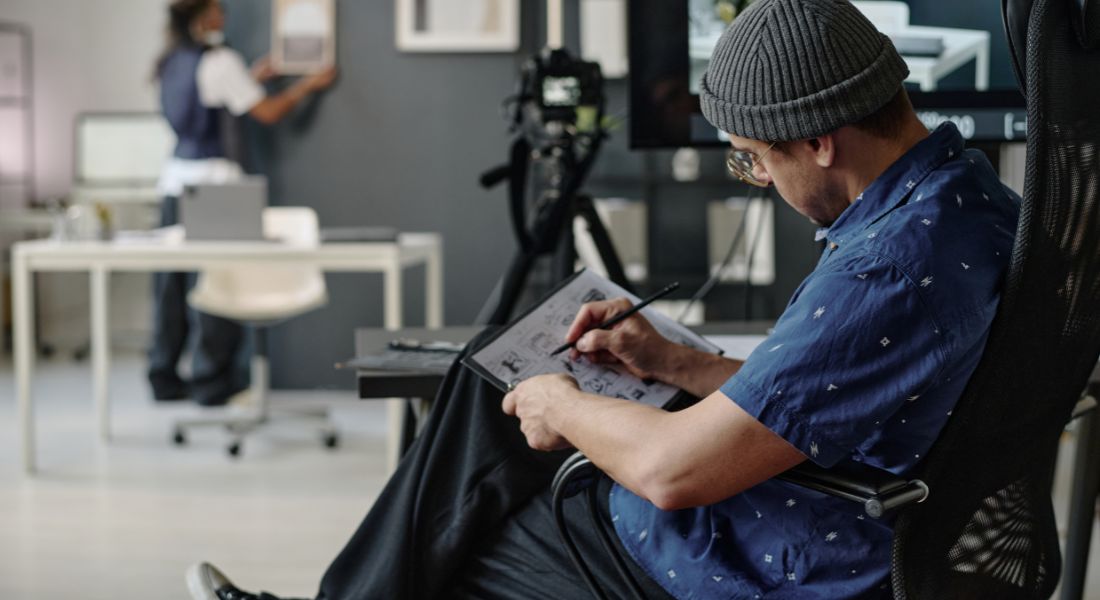
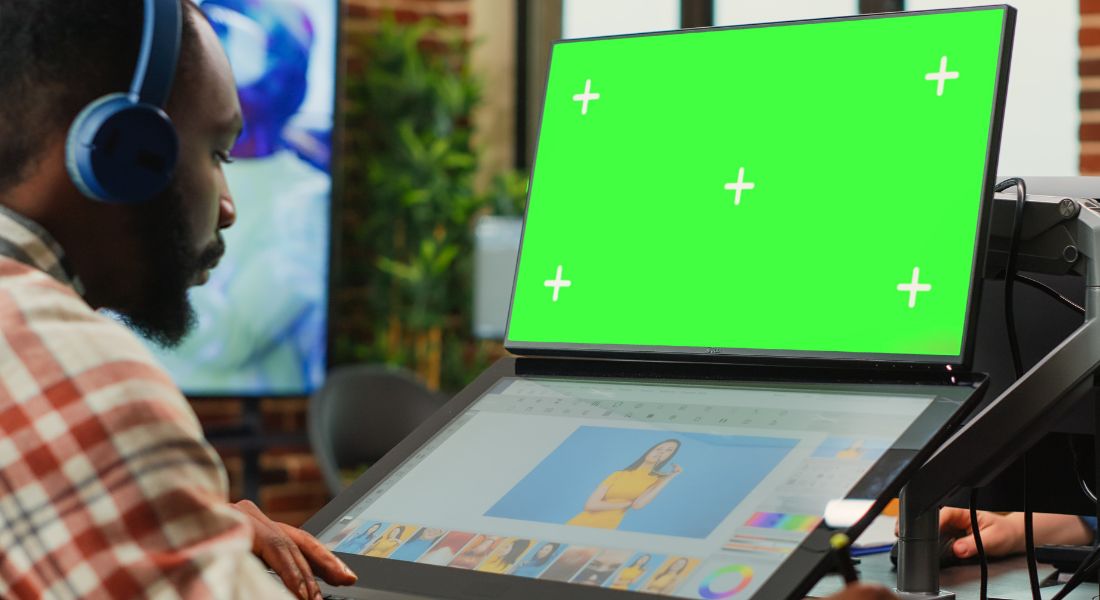
Step 5: Rotoscoping and Masking Tricks
Sometimes your animated character won’t just float in front of the scene they’ll need to move behind real actors or objects, pass through doorways, or peek out from behind furniture. To make that look convincing, you’ll need to use rotoscoping and masking techniques to layer your elements correctly.
Rotoscoping is the process of cutting out parts of your live-action footage so your animation can interact with the real world in a believable way. It gives your animation depth and makes it feel like it truly exists within the scene, not just on top of it.
Key Techniques to Try:
- Use After Effects’ Rotobrush or Bezier masking
The Rotobrush tool is great for quickly isolating moving subjects like a walking actor or waving hand. For simpler or static elements, Bezier masking gives you manual control over shapes and edges. - Try frame-by-frame rotoscoping for precision
Automatic tools are helpful, but sometimes you’ll need to go frame by frame for better accuracy especially if the edges are messy or the background is complex. - Feather edges and match motion blur
Once your mask is in place, softening the edges (feathering) helps blend the layers. Also, matching the motion blur of your footage adds realism, especially if the actor or object is moving quickly.
While rotoscoping can be time-consuming, it’s a vital step when you want animated elements to appear truly integrated with live-action footage. The extra effort pays off by adding realism and depth to your final scene.
Step 6: Match Depth of Field and Motion Blur
Even if your lighting, tracking, and masking are spot-on, your animation can still feel “pasted on” if it doesn’t share the same visual characteristics as the live-action footage. Two key areas to watch out for are depth of field and motion blur. These subtle touches go a long way in helping your animation blend in seamlessly.
Here’s how to do it right:
- Match the depth of field
If your live-action footage has a shallow depth of field where only part of the image is in sharp focus your animated elements should follow suit. For example, if the background is softly blurred, your animated character shouldn’t appear tack-sharp. Use Gaussian blur or depth passes to simulate the same camera focus effects. - Add motion blur that matches the real camera
Real cameras naturally create blur when subjects or the camera move quickly. If your animated character moves but stays perfectly crisp, it’ll feel unnatural. Most animation and compositing software let you apply motion blur either manually or automatically based on movement speed. - Apply grain overlays or film texture
Digital animation often looks too clean compared to live-action footage, especially if you’re working with high-res video. Adding a subtle film grain or noise overlay to your animation helps unify the overall look. It’s a small detail, but it makes a big difference in how cohesive the final result feels.
By matching the camera’s characteristics blur, focus, and texture you help erase the digital divide between real and animated elements, making your scene feel like one believable world.
Step 7: Get Interaction Right
One of the things that made Who Framed Roger Rabbit so memorable was how naturally the animated characters seemed to exist in the real world. That sense of believability came from clever on-set interactions between real actors, practical effects, and invisible cartoon characters. To recreate that kind of magic, you need to carefully plan how your animated characters will physically interact with the live-action world and vice versa.
Here are a few simple but effective ways to do it:
- Use real props or set pieces that “move” with animation
For example, if your animated character opens a door or knocks over a glass, have those real objects move on set. You can use wires, puppeteering, or just shoot a take where someone manually interacts with them, then sync it up with the animation in post. - Have actors physically react to the character
Teach your actors to respond to pulls, bumps, or nudges from characters that aren’t there. A glance at the right moment, a shift in balance, or a startled reaction can sell the idea that something or someone is actually sharing the space with them. - Simulate shadows and reflections
These subtle details do a lot of heavy lifting. Adding a soft shadow beneath your animated character or a faint reflection on a shiny surface (like a table or window) helps anchor them in the scene and creates the illusion of physical presence.
These practical interactions are often what separate believable animation from obvious composites. Even simple touches like a creaky door opening or a real chair tipping slightly can trick the brain into accepting the character as part of the environment. The more grounded the interaction, the more convincing the effect.
Inspiration from the Pros
Since Who Framed Roger Rabbit, many filmmakers and studios have pushed the boundaries of blending animation with live action drawing on the same core principles while adding modern twists. Whether it’s for big-budget films, TV series, or commercials, the techniques they use can be incredibly helpful for indie creators too.
Here are a few pro-level tricks worth borrowing:
- Frame doubling to match traditional animation timing
Classic hand-drawn animation often runs on “twos” holding each drawing for two frames to create a choppy, stylised rhythm. Some filmmakers use this technique to preserve that nostalgic cartoon feel when integrating 2D animation with smooth live-action footage. - On-set puppet animation for reference
Instead of guessing how an animated character moves, some productions use puppets or animatronic stand-ins during the shoot. This gives actors something physical to respond to and provides animators with a real-world motion reference in post. - Mixing 2D and 3D elements
Combining flat, hand-drawn characters with more dimensional 3D elements can make different parts of your scene feel more dynamic. For example, a 2D character might walk through a 3D-rendered environment or interact with a 3D object for added realism.
You don’t need a Spielberg-sized team or Disney’s budget to apply these ideas. Even using one or two of these tricks thoughtfully can elevate your hybrid scenes and make your animated/live-action blend feel far more polished and professional.
Software Recommendations
You don’t need a full VFX studio to pull off a convincing blend of animation and live action just the right set of tools. Whether you’re working in 2D or 3D, these software options cover everything from animation and compositing to tracking and final colour grading.
- After Effects
A go-to tool for rotoscoping, compositing, and motion graphics. With built-in support for Mocha AE, it also handles camera tracking and masking with precision perfect for scenes where animated characters interact closely with real footage. - Blender
A free, open-source powerhouse that offers robust 3D animation and match-moving features. Ideal for creators who want to track camera movement, animate 3D characters, and composite everything in one place. - TVPaint or Toon Boom Harmony
Both are industry-standard tools for traditional-style 2D animation. If you’re aiming for that hand-drawn, Roger Rabbit-inspired look, these platforms give you frame-by-frame control and smooth layering with audio syncing. - DaVinci Resolve
Known for its powerful colour correction and finishing tools, Resolve is excellent for adding that final polish. It ensures that your live-action and animated elements share the same visual tone and cinematic feel.
Mix and match based on your workflow, skillset, and project needs. You don’t need to master everything just choose the tools that support your creative vision.
Final Thought: Bringing Animation and Live Action Together
Blending animated characters with real actors is no longer a studio-only secret. With thoughtful planning, consistent lighting, and some smart post-production, you can create eye-popping, believable scenes on an indie budget.
You can contact our animation company in London to take your content to the next level. From rotoscoping to character animation, we’ve helped creators pull off seamless animation/live-action hybrids with style.