


Filming high-quality videos no longer requires access to a professional studio, a large production team, or an expensive setup. With today’s accessible technology and a few strategic choices, you can create an impressive DIY video studio right within your office space no matter how small or basic it might seem. From brand videos and product demos to online training sessions, interviews, or even internal communications, video content has become an essential tool for modern businesses. And the good news is: setting up your own video studio doesn’t have to be complicated or costly.
Whether you’re working from a spacious corporate office or a compact home office, there are plenty of ways to optimise your environment to produce professional-looking videos that engage and inform your audience. All you need is a clear plan, the right mix of lighting, sound, and framing, and a willingness to get creative with your space.
In this guide, we’ll walk you through each step of the process from choosing the right location and gear to fine-tuning lighting and audio for crisp, polished results. With the tips and tricks ahead, you’ll be able to turn any quiet corner into a powerful content-creation zone that elevates your brand and boosts your video production confidence.
Choose the Right Space

Your first step in building a DIY video studio is selecting the right space. You don’t need a large area a quiet, low-traffic corner of your office can do wonders if it’s optimised well. The key is to prioritise control over environment rather than size. Spaces that are calm, acoustically dampened, and free from interruptions will make the biggest difference in your video quality.
Look for a room or section that naturally reduces noise. Corner offices are especially good since they generally have fewer windows and are more isolated from central activity zones. Think about how much noise you typically hear in the space throughout the day is it close to a kitchen, corridor, or meeting room? If so, consider another spot.
Choose an area with soft furnishings such as carpets, curtains, cushions, or upholstered chairs. These items absorb sound and reduce echo, creating cleaner audio in your recordings. If your office has hard floors and glass walls, you can introduce rugs, acoustic panels, or even fabric dividers to create a more sound-friendly environment.
Also, keep in mind what’s outside the space. Avoid proximity to HVAC vents, elevators, washrooms, or windows that face a busy road. These sources may not seem loud to the ear, but microphones can pick them up clearly, creating a distracting hum or background noise in your videos.
Another important tip: measure the space before setting up. Even a small area about 4×6 feet can work effectively if you plan well. You’ll need room for your subject (or yourself), camera, lights, and backdrop. Take note of ceiling height too, as low ceilings may limit how high you can place lighting equipment.
Think ahead: is this a space where you can leave your setup in place, or will you need to tear it down regularly? A permanent space allows for consistency and faster setup, but if that’s not possible, keep your setup portable and mark your preferred positions with tape for quick reassembly.
Set Up a Clean Backdrop
Your video backdrop does more than fill empty space it visually communicates your brand’s identity and professionalism. A well-chosen background can enhance your message, build viewer trust, and eliminate distractions. On the flip side, a messy or inconsistent backdrop can make even high-quality video look amateurish.
Start by selecting a background that matches the tone and personality of your business. If you’re aiming for a clean, modern aesthetic, a plain wall painted in a neutral colour like light grey or off-white works perfectly. It allows your subject to stand out without pulling focus. For something more dynamic, consider using seamless paper rolls in colours like navy, beige, or charcoal. These are popular in video production because they’re easy to set up, non-reflective, and offer a consistent look across recordings.
For businesses that want to build brand recognition, a custom-branded backdrop can be a powerful visual cue. This could be a fabric or vinyl banner printed with your logo or company colours, placed behind the subject. It’s especially effective for interviews, webinars, and testimonial videos. Just ensure the branding is subtle enough not to overwhelm the viewer or compete with the speaker’s message.
You can also make your backdrop feel more inviting by incorporating stylish decor elements. For example:
- A neatly arranged bookshelf suggests expertise and knowledge.
- A few indoor plants add colour and natural warmth.
- Minimalist framed artwork or simple wall shelves can provide a modern, curated look.
The key here is balance. Your background should feel intentional and on-brand without being cluttered or overly busy. Avoid displaying too many personal items, family photos, or objects that reflect light awkwardly. These can pull attention away from your content or create technical problems with lighting.
Pro Tip: Record a few test shots with your background before committing. Look out for any glare, colour issues, or objects in the frame that may be distracting. This simple check can save hours in post-production later.
Control Your Lighting
Lighting is arguably the single most important factor that separates amateur-looking videos from professional-grade content. Even the best camera can’t compensate for bad lighting. If your subject is poorly lit, your footage may end up looking grainy, flat, or overly dramatic in all the wrong ways.
The goal is soft, balanced, and flattering light that eliminates harsh shadows and highlights your subject naturally. A well-lit shot instantly elevates the perceived quality of your video even if everything else is fairly basic.
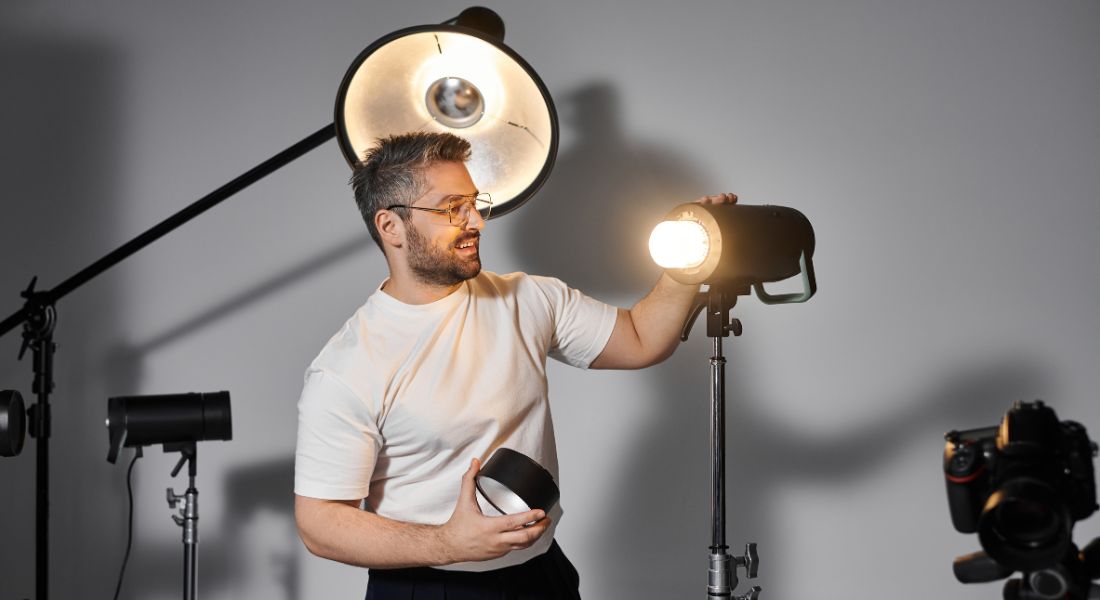
One of the most effective approaches is the three-point lighting technique, a staple in video production for good reason:
- Key Light: This is your main light source. Position it at a 45° angle to one side of the subject’s face. It creates the primary illumination and defines the shape of the subject.
- Fill Light: Placed on the opposite side of the key light, this softens shadows cast by the key light. It should be less intense than the key to avoid flattening the image.
- Back Light (or Hair Light): Positioned behind or slightly above the subject, this adds depth by separating the subject from the background. It can give a subtle glow to hair or shoulders and create a more cinematic feel.
Working on a budget? Don’t worry there are plenty of affordable options:
- Ring lights are excellent for evenly lighting faces in tight spaces, especially for talking-head videos.
- LED panel lights with adjustable brightness and colour temperature (measured in Kelvin) give you flexibility. Warmer lights (around 3200K) mimic indoor lighting, while cooler lights (5600K) match daylight.
If you have access to natural light, it can be beautiful and free but it’s also unpredictable. For consistency, try filming at the same time each day (e.g., 10 a.m. when the sun isn’t too harsh) and use sheer curtains to diffuse sunlight. However, don’t rely solely on daylight, as weather changes and shifting sun angles can lead to major inconsistencies between takes.
Also, consider your background lighting. A simple desk lamp or RGB light can add warmth or mood to the scene and help balance the exposure. Avoid mixing light sources with vastly different colour temperatures unless you’re going for a deliberate creative effect.
Improve Sound Quality
When it comes to video production, sound is often the unsung hero. Many creators obsess over the visual quality, yet neglect audio which can seriously undermine the overall impact of your content. In reality, poor audio is more jarring than slightly blurry or underexposed visuals. Viewers might tolerate a shaky camera, but they’ll click away fast if they can’t clearly hear what’s being said.
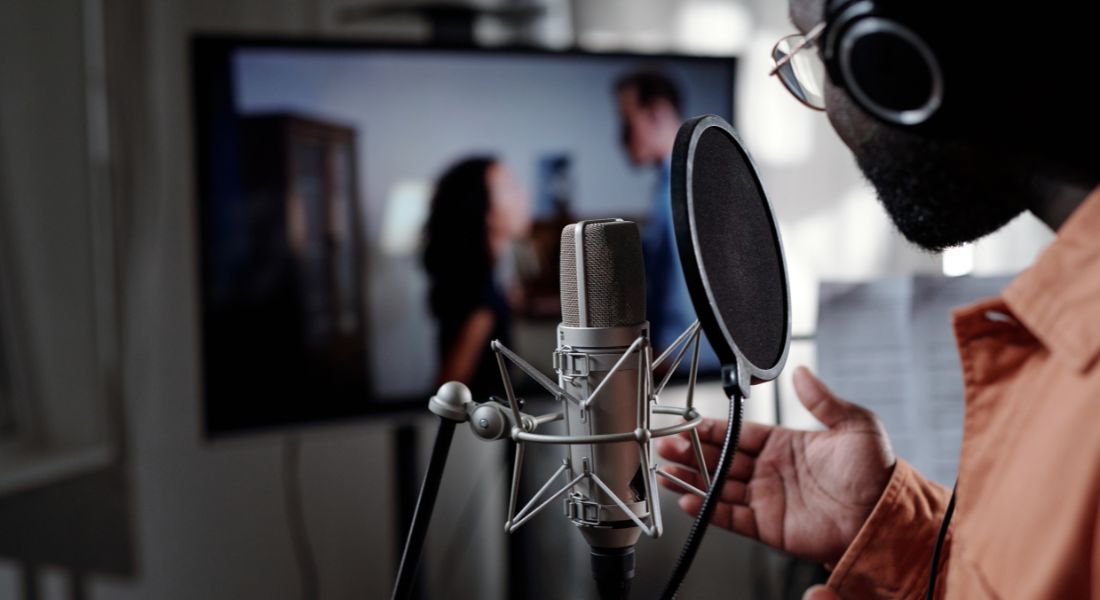
The first step is to avoid using built-in microphones whether from a laptop, phone, or camera. These mics pick up everything, from room echo to fan noise, and often sound hollow or tinny. Instead, invest in an external microphone that suits your recording setup and environment:
- USB condenser microphones: These are ideal for office setups and podcast-style recordings. They’re plug-and-play, deliver crisp vocals, and usually come with cardioid pickup patterns to minimise background noise.
- Lavalier (lapel) microphones: Compact and discreet, lav mics clip onto your clothing and offer great mobility. Perfect for interviews or when you’re moving around in the frame.
- Shotgun microphones: These directional mics are excellent at capturing focused sound from the front while rejecting noise from the sides and rear ideal for use with cameras or boom poles.
Beyond the mic, your recording environment matters just as much. Even the best microphone can’t perform well in a room full of echo or background hum. Consider the following to improve acoustics:
- Add soft surfaces: Rugs, carpets, curtains, and upholstered furniture can all help absorb sound and reduce reverb.
- Use foam panels or portable sound shields to reduce echo in more reflective spaces.
- Bookshelves and soft furnishings can act as natural sound absorbers, giving your audio a warmer, more intimate feel.
Before each shoot, record a short test clip no exceptions. This quick step lets you catch unexpected issues like low battery, mic cable interference, laptop fan noise, or overly loud background sounds. It’s much easier to fix problems before you hit record for real.
Position Your Camera Properly
Where and how you position your camera can significantly impact the overall look and feel of your video. A poorly framed shot too high, too low, or off-centre can feel amateurish and distracting, even if your content is strong. To appear polished, professional, and approachable, the key is to position your camera at eye level and frame yourself properly.
If you’re filming with a smartphone, avoid holding it in your hand, as even the slightest movements can lead to shaky footage that looks unprofessional. Instead, use a sturdy tripod, phone mount, or at least a stack of books or boxes to raise the phone to the right height. Turn on your phone’s gridlines to help centre your shot and ensure it’s level. Also, activate the focus and exposure lock so the lighting and sharpness remain consistent throughout the recording.
For those using a laptop or external webcam, don’t settle for the default angle where you’re looking down at the camera. This creates an awkward, unflattering perspective. Use a riser, laptop stand, or stack of books to bring the camera up to your eye level. This simple adjustment can make your video feel more natural and engaging. If your built-in webcam doesn’t offer good resolution, consider investing in a higher-quality 1080p or 4K webcam to enhance the clarity and professionalism of your visuals.
Framing also matters. Position yourself in the centre of the screen with a little headroom at the top and some space on either side to avoid looking cramped. A well-balanced or symmetrical background can further stabilise the overall look of your frame, making it more aesthetically pleasing and easier for viewers to focus on you and your message.
Minimise Distractions
A big part of DIY video production is creating a controlled, distraction-free environment. Small interruptions can lower the quality and disrupt your message.
Here are a few simple yet essential steps:
- Turn off notifications on all devices.
- Put your phone on airplane mode.
- Close unused apps and browsers to prevent pop-ups.
- Inform colleagues you’re recording and hang a “Recording in Progress” sign if needed.
- Switch off noisy appliances like fans or printers nearby.
- Avoid wearing reflective glasses or jewellery that can catch light.
Before you hit record, scan your scene for blinking devices, tangled cables, or light leaks. These small fixes go a long way in making your setup look clean and intentional.
Create a Repeatable Workflow
Once your setup is dialled in and producing good results, the next step is to create a repeatable workflow. This will save you time, reduce stress, and ensure consistency across all your video projects whether you’re filming once a week or every day.
Start by marking your camera and lighting positions using painter’s tape on the floor. This small but effective step allows you to recreate your setup with precision every time. No more guessing where your tripod or lights should go it’s all laid out for you.
Next, label all your gear clearly, especially if you share your equipment with colleagues or move between locations. Use colour-coded stickers or tags to indicate which cables, lights, or lenses go with which camera or task. This not only speeds up setup but also helps prevent mistakes and missing items.
Cable management is another area that often gets overlooked. Use Velcro straps, cable ties, or adhesive clips to neatly bundle wires and secure them out of sight. A tidy space isn’t just visually appealing it also reduces the risk of tripping hazards and technical issues.
Create a master checklist either printed out or digital that you can refer to for every shoot. This should include tasks like charging batteries, clearing memory cards, checking audio levels, white balancing the camera, setting focus, and reviewing test shots. Over time, this checklist will become second nature and help you avoid costly oversights.
In post-production, you can also speed up your process by saving presets in your editing software. These might include templates for intro/outro sequences, consistent colour correction settings, text overlays, or standardised audio levels. Applying these presets ensures that your videos maintain a uniform look and feel, which strengthens your brand identity.
By building these habits and systems into your workflow, you eliminate the guesswork and allow yourself to focus on creativity and storytelling. Consistency not only saves time it makes your videos look polished and professional, which builds credibility and trust with your audience over time.
Final Thoughts: Your Office Studio Made Simple
Creating a DIY video studio in your office is more about smart decisions than expensive gear. With a clear strategy, a few essential tools, and a bit of practice, you can produce high-quality videos that reflect your brand and connect with your audience. Whether you’re starting small or levelling up existing content, consistency and creativity are your best assets.
We’re here to help. Whether you’re new to video production or looking to level up your existing content, our experienced team can guide you every step of the way from planning and filming to editing and final delivery. Contact our video production company today to bring your ideas to life with professional support and high-impact visuals that truly connect with your audience.