


Storyboarding is a critical part of the pre-production process for any video whether you’re producing a short commercial, a corporate explainer, or a cinematic narrative. It’s the foundation that allows you to visualise each scene before you ever hit record. By mapping out your shots, you can plan camera angles, lighting setups, transitions, and pacing in a way that keeps your production efficient and your messaging clear. It also provides a tangible reference point that helps you communicate your ideas clearly with clients, collaborators, and crew members.
Traditionally, storyboarding involved either sketching by hand or hiring a professional illustrator or designer. While effective, both methods can be time-consuming and costly especially if your concept evolves over time and requires constant revisions. This can be a major hurdle for smaller teams, freelance creatives, or anyone working on a tight deadline.
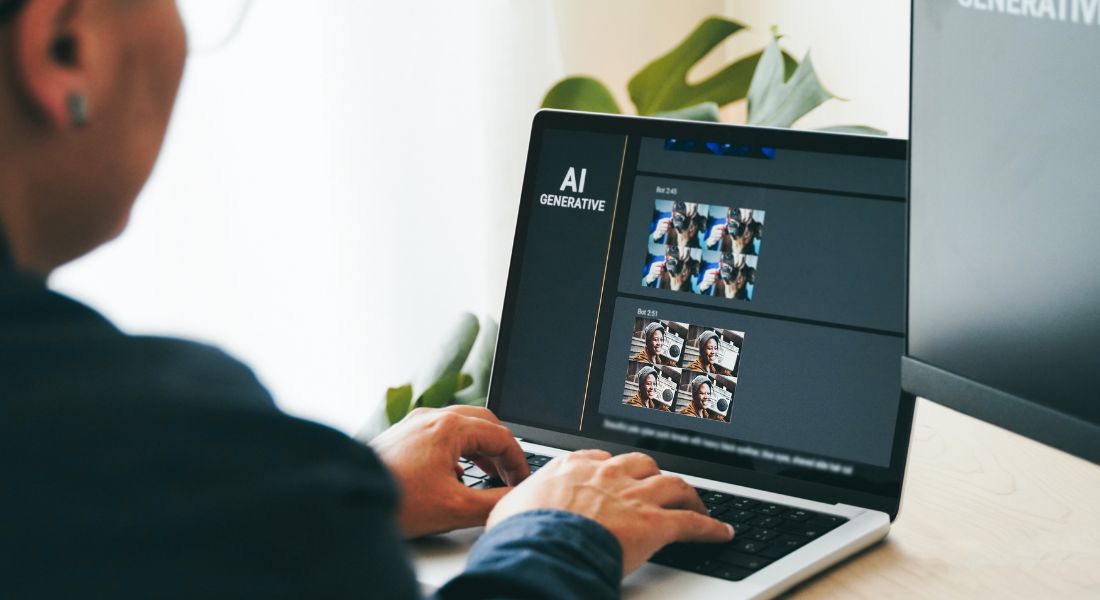
Enter Midjourney: a powerful AI image-generation tool that’s changing the way creatives visualise ideas. Using natural language prompts, Midjourney allows you to generate highly detailed, artistic renderings of scenes, characters, environments, and even lighting styles all in a matter of seconds. What once took hours (or days) to sketch and revise can now be produced instantly, giving you more time to refine your story and perfect your execution.
In this guide, we’ll explore how you can use Midjourney to create professional-looking storyboards that align perfectly with your creative vision. You’ll learn how to craft the right prompts, iterate quickly, and use these visuals to enhance collaboration and speed up your production workflow. Whether you’re a solo content creator or part of a larger production team, Midjourney offers a fast, affordable, and visually compelling solution for modern storyboarding.
1. What is Midjourney and How Does It Work?
Midjourney is an AI-powered image-generation tool that uses advanced deep learning algorithms to create visually striking images from simple text-based prompts. It operates on a model similar to other generative AI tools, but with a unique focus on artistic quality, stylistic depth, and visual storytelling. What sets Midjourney apart is its ability to interpret highly nuanced language and turn it into stunning, coherent visuals that can mimic a range of artistic styles from hyper-realistic to abstract, cinematic, or sketch-like aesthetics.
At its core, Midjourney understands natural language descriptions, which means you don’t need any design experience to use it. Simply describe what you imagine a bustling city at dusk, a close-up of a character under soft lighting, or a wide establishing shot of a mountain landscape and the AI will generate high-quality artwork that aligns with your input. This makes it an especially valuable tool for video creators during the early concept and pre-production phases.
Rather than spending hours sketching ideas or hiring an illustrator, you can quickly iterate and explore visual directions using just your words. Whether you’re developing a brand video, planning a product demo, or mapping out scenes for a short film, Midjourney allows you to visualise your ideas almost instantly.
Key Features of Midjourney for Storyboarding:
- AI-Driven Design
Generate custom images from scratch using detailed prompts. You can specify visual elements like composition, subject placement, camera angle, lighting conditions, mood, art style, and even colour palette. This level of control makes it ideal for crafting storyboards that accurately reflect your creative vision. - Instant Visuals
No more waiting on design revisions or struggling with drawing software. Midjourney delivers fast results often within a minute so you can explore multiple ideas in the time it would normally take to sketch one. - High-Quality Images
The artwork produced by Midjourney is rich in detail and style, making it perfect for presenting concepts to clients, collaborators, or production teams. These images can stand alone as polished storyboards or be used as references for designers, cinematographers, or animators. - Versatile Output
Whether you want black-and-white sketches for traditional storyboards or fully coloured cinematic shots for pitch decks or client presentations, Midjourney gives you the flexibility to choose your desired look and feel. - Iterative Creativity
Because the process is so fast and intuitive, you can experiment freely with different versions of a scene try different camera angles, moods, or time-of-day settings without worrying about resource constraints.
In short, Midjourney acts like your own virtual concept artist. It’s not just a tool for beautiful images; it’s a practical solution for modern video creators who need to move fast, stay flexible, and clearly communicate complex ideas in visual form.
2. How to Use Midjourney for Video Storyboarding
Using Midjourney to generate storyboards is a game-changer for video creators, especially those working on tight timelines or limited budgets. The process is intuitive, flexible, and surprisingly powerful once you get the hang of prompt crafting. Here’s a detailed, step-by-step guide to help you unlock the full potential of Midjourney for storyboarding your next video.
Step 1: Define Your Scene Description
Before opening Midjourney, spend a few minutes outlining the core elements of your scene. Think of this step as writing a mini shot description that includes:
- Setting: Where does the scene take place? Is it an indoor room, a forest, a city street at night?
- Subject(s): Who or what is the focus of the frame? A person, product, vehicle, or abstract object?
- Mood and Tone: Is the scene meant to feel tense, joyful, mysterious, peaceful, or dramatic?
- Lighting and Colour: Natural sunlight, harsh fluorescent, golden-hour glow, deep shadows, etc.
- Camera Angle and Framing: Wide shot, over-the-shoulder, close-up, top-down?
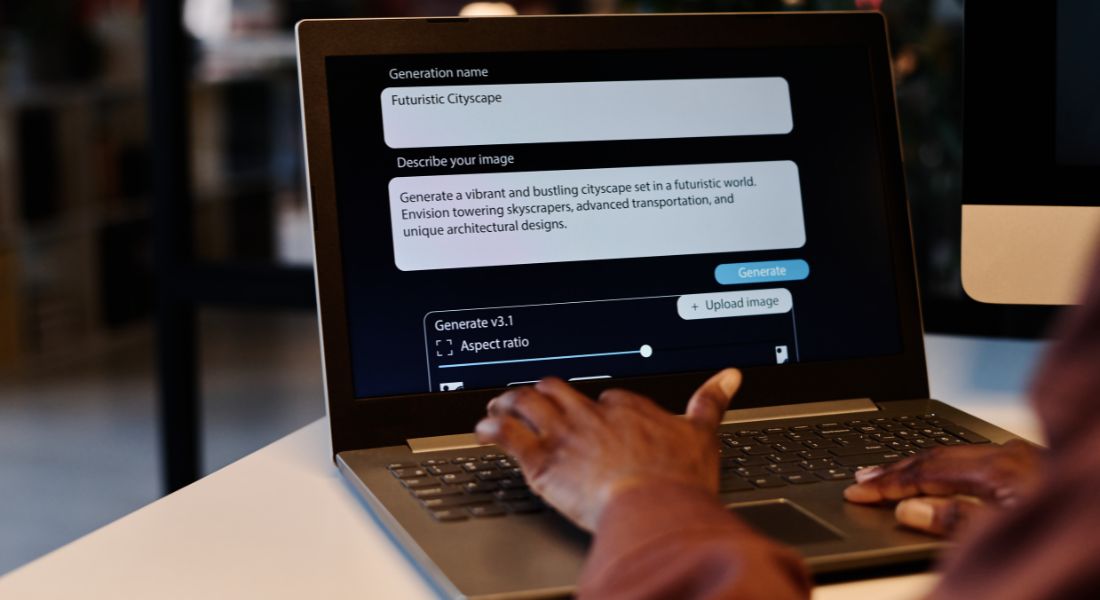
The more specific your prompt, the better your results will be. Here’s an example of a well-structured prompt:
“A cinematic close-up of a woman standing by a window at sunset, looking out at a glowing city skyline. The lighting is soft and warm, casting a golden hue across her face. The mood is calm and introspective, shot with shallow depth of field.”
By including both visual details and emotional cues, you give Midjourney the context it needs to generate something aligned with your scene’s purpose.
Step 2: Use Midjourney to Generate Images
Once your prompt is ready, open Midjourney (typically via its Discord interface) and input your description using the /imagine command. The AI will interpret your request and return four unique image variations within about a minute. These initial outputs act as your starting point.
- Not happy with the result? Reword your prompt slightly and try again.
- Want to explore one variation further? Use the upscaling or variation buttons to fine-tune that specific image.
You can iterate endlessly adjusting composition, lighting, or even art style (e.g., “in noir style” or “in Pixar animation style”) to match your creative direction.
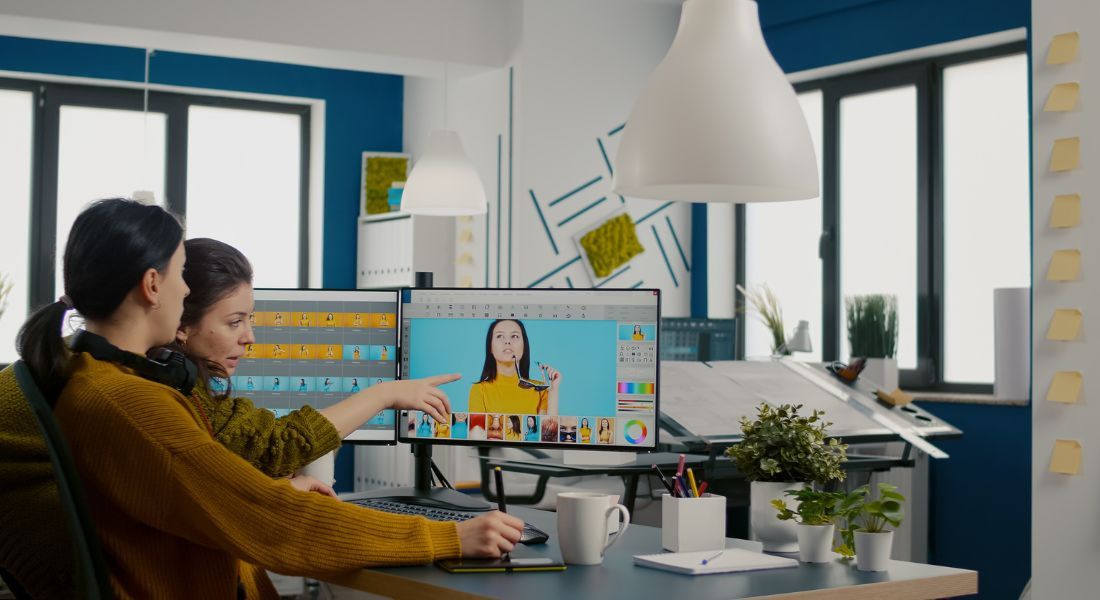
Step 3: Refine and Customise the Images
Midjourney gives you the option to upscale images for better resolution or generate slight variations on an image you like. If you’re using these images professionally, you might want to refine them further using editing tools like:
- Photoshop (to remove or add specific elements)
- Canva or Figma (for assembling frames into a full storyboard layout)
- Runway ML or Topaz (for additional upscaling or AI enhancements)
You can also combine these images with annotations like dialogue, camera movements, or notes on transitions to make your storyboard even more useful for collaborators.
Step 4: Create Your Full Storyboard
Repeat the process for each key scene in your video. You don’t need to storyboard every single second of footage just the moments that matter for timing, tone, and visuals. These might include:
- Opening and closing shots
- Key transitions
- Dialogue-heavy scenes
- Visual effects or product reveals
As you collect your generated images, arrange them in a clear, sequential layout using your preferred design tool. Add text below each frame to describe action, dialogue, or camera direction. By the end of this process, you’ll have a comprehensive, professional-quality storyboard that communicates your concept clearly to clients, crew members, or stakeholders without hiring a storyboard artist or spending hours sketching by hand.
3. Advantages of Using Midjourney for Storyboarding
Midjourney isn’t just a novelty it’s a practical, powerful tool that offers a range of benefits for video creators across all industries. From speeding up the creative workflow to enhancing collaboration with clients, Midjourney addresses many of the traditional pain points in pre-production. Here’s a closer look at why it’s becoming a go-to solution for modern storyboarding.
1. Speed and Efficiency
Creating hand-drawn storyboards or commissioning custom visuals can take hours or even days especially when your video includes multiple locations, characters, or camera angles. Midjourney, by contrast, enables you to generate high-quality visuals in a matter of minutes.
This rapid turnaround allows for:
- Faster decision-making during creative reviews
- Quicker iterations when scripts or shot lists change
- The ability to visualise multiple scene options side-by-side before committing to one
In fast-paced environments where deadlines are tight, this kind of speed is a game-changer. You can produce entire storyboards in a single afternoon, which previously might have taken an entire week.
2. Cost-Effective Production
Hiring a storyboard artist or graphic designer can be expensive especially if you’re working on a limited budget or producing a high volume of content. Depending on complexity, each frame can cost anywhere from £10 to £100 or more.
Midjourney dramatically reduces those costs. For the price of a subscription (or even on a pay-per-image model), you can generate unlimited visuals, revise them as needed, and explore multiple creative directions without incurring extra charges.
This makes it an ideal solution for:
- Freelancers or solo creators who need to manage costs
- Agencies handling multiple clients and campaigns
- In-house video teams looking to streamline production without sacrificing quality
3. Creative Freedom Without Constraints
Traditional storyboarding often relies on your own sketching ability or the style of a hired illustrator. That can sometimes limit your creative range especially if you’re trying to imagine scenes with complex lighting, fantasy elements, or stylised aesthetics.
With Midjourney, those limitations disappear. The AI can generate images in a wide variety of styles and genres, from photorealistic cinematography to hand-drawn animation or noir-inspired film stills.
You can freely experiment with:
- Different moods or atmospheres (e.g., ominous, whimsical, serene)
- Various art styles (e.g., comic book, painterly, futuristic)
- Camera angles and compositions you might not have thought to sketch manually
This freedom to explore encourages bold, imaginative storytelling. You might find yourself developing scenes or visual motifs you wouldn’t have otherwise considered.
4. Better Client Communication and Buy-In
One of the biggest challenges in video production is getting clients, stakeholders, or collaborators to visualise the final product especially in early stages where little has been shot. Verbal explanations or rough sketches can only go so far.
Midjourney bridges that communication gap by turning ideas into clear, polished visuals. Instead of saying, “Imagine a dimly lit alleyway with mist and flickering neon lights,” you can show them exactly what you mean in a generated image.
This leads to:
- Faster approvals and fewer revisions
- Easier feedback collection during pitch or proposal stages
- Improved collaboration between creative teams, clients, and production staff
Clients don’t need to have an artistic eye they can simply respond to the visual you’ve created and offer input with confidence. This visual clarity helps align everyone on the same creative vision before filming begins.
5. Scalable for Any Project Size
Whether you’re producing a short social media video or a multi-part brand campaign, Midjourney scales to fit the scope of your project. You can storyboard only key moments or go frame-by-frame depending on your needs. This adaptability is especially valuable in agile or iterative production models, where scenes may change rapidly.
4. Tips for Optimising Your Midjourney Prompts
The secret to getting the most out of Midjourney lies in the prompt you provide. While the tool is incredibly powerful, it’s not a mind reader it depends entirely on the clarity, detail, and creativity of your instructions. Well-written prompts can make the difference between a generic image and a stunning, storyboard-worthy visual that perfectly matches your scene.
Here are some practical tips to help you craft better prompts and get professional-grade results:
1. Be Specific and Descriptive
Generic inputs will lead to generic outputs. If you simply write “a sunset scene” or “a woman in an office,” Midjourney will produce an image but it might not match your vision. The more specific your prompt, the more the AI has to work with.
Include details like:
- Time of day: “Golden hour,” “late afternoon,” “midnight”
- Weather or lighting conditions: “Soft diffused light through fog,” “bright sunlight casting long shadows”
- Camera angle: “Over-the-shoulder,” “wide establishing shot,” “low-angle close-up”
- Mood or tone: “Tense and suspenseful,” “romantic and warm,” “corporate and sterile”
Example:
Instead of saying “Man walking down a street”, try:
“A man in a dark coat walking alone down a dimly lit alley at night, with neon lights reflecting off wet pavement, shot from behind in a noir style.”
This helps Midjourney create an image that’s closer to what’s in your head.
2. Include Style and Genre References
If you have a specific look or feel in mind such as a cinematic tone, a particular art movement, or a visual reference from a film add that to your prompt. This tells Midjourney how to style the image.
Useful tags might include:
- Art styles: “watercolour,” “sketch,” “realistic oil painting,” “digital concept art”
- Cinematic influences: “Blade Runner style,” “Wes Anderson palette,” “Kubrick composition”
- Animation references: “Pixar-style character,” “Studio Ghibli environment,” “comic book aesthetic”
Example:
“A retro 80s sci-fi control room with glowing blue monitors and metallic textures, shot from a wide angle in the style of Blade Runner.”
These references give the AI a visual language to emulate.
3. Use Composition Keywords
Think like a cinematographer or director. Use language that helps the AI interpret your intended shot composition and scene layout. Keywords you might include:
- Framing: “tight shot,” “medium shot,” “wide angle,” “top-down view”
- Focus: “shallow depth of field,” “foreground subject in focus, background blurred”
- Movement: “slow dolly shot,” “static frame,” “character entering from left”
Example:
“Medium close-up of a young girl reading a book by candlelight, with soft shadows flickering on her face, shallow depth of field, warm tones.”
These terms are especially useful when storyboarding specific shots that require clear planning.
4. Iterate and Refine
You won’t always get the perfect image on your first try and that’s okay. Part of the creative process with Midjourney involves testing different variations and refining your language.
Here’s how to iterate effectively:
- Tweak the phrasing slightly and re-run the prompt
- Add or remove stylistic descriptors depending on the result
- Use Midjourney’s built-in “variation” or “upscale” tools to explore image options
- Focus on one visual attribute at a time (e.g., lighting or colour) if the composition is already good
With each iteration, you’ll learn more about how the AI interprets your language and your prompts will become more powerful over time.
5. Save and Organise Your Best Prompts
When you find a prompt structure that works well, save it! You can reuse and adapt successful prompts across projects to maintain a consistent look or tone. Consider keeping a personal prompt library or storyboard template that includes:
- Prompt examples for different shot types (e.g., product close-up, dramatic wide shot)
- Common descriptors that align with your brand or client preferences
- Style tags that produce your desired visual tone (e.g., “gritty,” “polished,” “dreamlike”)
This kind of system saves time in future projects and ensures visual consistency across scenes or even across an entire video series.
Final Thought: Visualise Faster, Create Smarter
Using Midjourney to create storyboards is a game-changer for video creators, offering a fast, efficient, and cost-effective way to visualize scenes. Whether you’re working with clients, pitching a new idea, or preparing for a shoot, Midjourney helps you bring your creative vision to life with ease.
You can contact our video production company in London to take your video content to the next level whether you need storyboarding assistance or full video production support, we’re here to bring your concepts to life.