


Some video shoots feel almost effortless where everything aligns perfectly. The lighting is controlled, the studio is silent, schedules run like clockwork, and the space is designed to make your job easy. In these ideal conditions, you can focus entirely on the creative process, confident that your technical setup is rock solid.
But then, there are the shoots that test your patience, skills, and resourcefulness. The ones where you’re squeezed into a tiny, cluttered room with barely enough space to move, battling constant background noise from nearby traffic or construction, dodging curious passersby in crowded public spaces, or trying desperately to keep your equipment dry while the weather flips between sun, rain, and wind every few minutes. These are the real-world scenarios that many video professionals encounter regularly especially when working on tight timelines, limited budgets, or in locations that weren’t designed with filming in mind.
If you’ve ever filmed in such a tricky location, you know it takes much more than just a great camera and lens to pull it off successfully. It requires thorough preparation, quick thinking, adaptability, and smart decision-making in the moment. You need to anticipate potential obstacles, adjust your plans on the fly, and often get creative to make the most of less-than-ideal circumstances. The good news? With careful planning, the right gear choices, and a handful of clever workarounds, you can still deliver professional, polished footage even when the environment seems determined to work against you. Challenging conditions don’t have to mean compromised quality or missed deadlines.
In this comprehensive guide, I’ll walk you through proven strategies and practical tips for shooting video in difficult environments. Whether you’re dealing with noisy city streets, dim lighting, unpredictable weather, remote or hard-to-access locations, or cramped indoor spaces, these insights will help you stay calm under pressure, maintain your creative vision, and most importantly get the shot you need.
1. Understand Your Environment Before You Arrive
Preparation starts long before you set foot on location. The more familiar you are with the space, the smoother everything will run on the day of the shoot.
Tips for scouting challenging environments:
- Visit in advance
If possible, visit the location beforehand. Pay close attention to ambient noise, lighting conditions (both natural and artificial), power sources, and any physical obstacles or safety hazards. - Check the forecast
Weather can make or break an outdoor shoot. Use reliable apps to monitor conditions leading up to the day. If rain, snow, or wind is on the cards, have clear contingency plans in place. - Assess access
Consider logistics: Can you drive up to the site, or will you need to carry equipment long distances or up flights of stairs? Are there lifts or loading bays available? - Note restrictions
Some public spaces may require filming permits, limit the type of equipment you can use, or have specific hours when filming is allowed. Make sure you understand any rules in advance.
The more you know going in, the fewer surprises you’ll encounter and the more confident and prepared your team will be.
2. Pack Smart: Gear Essentials for Tough Locations
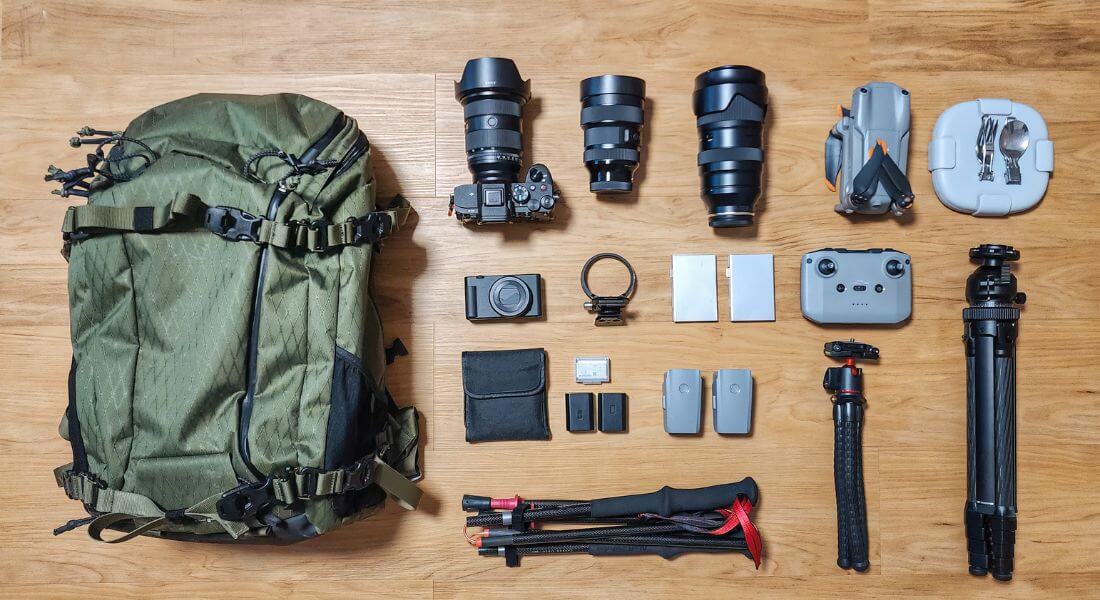
When space is limited or conditions are unpredictable, every item in your kit needs to serve a clear purpose. Lugging around excess gear slows you down and increases the chance of something getting damaged or simply getting in the way.
Here’s what to include in your go-to kit for challenging locations:
- Lightweight tripod or monopod
These are much easier to manoeuvre in crowds, tight corridors, or uneven terrain compared to heavier, full-sized tripods. - Portable LED lights
Battery-powered light panels provide reliable, consistent lighting when there’s no access to mains power. Bonus: they’re compact and easy to adjust on the fly. - Fast lenses
Lenses with wide apertures (f/1.8 or f/2.8) are a lifesaver in low-light environments, allowing you to capture clean footage without pushing ISO too far. - Weather protection
Always pack lens hoods, rain covers, and a few silica gel packs to protect your gear from sudden downpours or moisture buildup. - Portable audio recorder
When built-in camera mics can’t cut through the noise, a dedicated recorder ensures cleaner, more professional sound. - Power banks and spare batteries
Cold weather and long shooting days drain batteries faster than you expect. Having backups could save your shoot. - Gaffer tape
The unsung hero of any shoot perfect for taping down loose cables, fixing light stands, or making emergency repairs.
In unpredictable environments, lighter and simpler often means faster, safer, and more adaptable.
3. Shooting in Noisy Environments

Busy streets, construction zones, public events these locations can add energy and realism to your video, but they also present serious audio challenges. Capturing clean sound in these conditions takes planning and the right tools.
How to reduce unwanted noise:
- Use a directional microphone
Shotgun mics are designed to pick up sound directly in front of them while rejecting side and rear noise ideal for isolating your subject’s voice in loud environments. - Get closer
The closer your mic is to the source, the stronger and cleaner the signal will be compared to ambient noise. Use boom poles or position lav mics strategically. - Record a clean backup
A lavalier mic hidden under clothing can act as insurance in case your primary mic picks up too much interference. - Capture ambient sound separately
Always record at least 30 seconds of “room tone” or environmental sound. It’s essential for smoothing out edits and cleaning up noisy audio in post-production. - Choose timing carefully
If you can’t control the environment, work with it. Wait for quieter moments a gap in traffic, a pause in construction to capture your key audio.
And remember clear, professional audio often makes more impact than flawless visuals. Bad sound can ruin even the best-looking footage.
4. Dealing with Low Light
From poorly lit warehouses to outdoor night shoots, low-light conditions can seriously test your equipment and your skills. But with the right tools and techniques, you can still produce clean, cinematic footage.
How to maintain quality in low light:
- Use fast lenses
A lens with a wide aperture (like f/1.8 or f/2.8) allows more light to reach the sensor, helping reduce digital noise and motion blur. - Increase ISO cautiously
While many modern cameras perform well at high ISO levels, pushing it too far can still introduce grain and reduce dynamic range. Strike a balance between brightness and clarity. - Bring portable lighting
Compact, battery-powered LED panels are ideal for lifting shadows and adding a bit of shape to your subject without overpowering the scene or requiring mains power. - Use reflectors
If you have even a small light source, bounce it back onto your subject using a reflector to soften harsh shadows and add natural fill. - Shoot in RAW
RAW files retain much more image data than compressed formats like JPEG or H.264, giving you far more flexibility in post-production to adjust exposure, contrast, and noise reduction.
Even in low light, it’s possible to achieve professional results just be prepared to adapt your setup and lean on the strengths of your gear.
5. Working in Small Spaces
Filming in tight quarters like office cubicles, small shops, or even lifts can limit your options, but it doesn’t have to limit your creativity. With the right setup and a bit of planning, you can make even the smallest space work.
Solutions for filming in confined areas:
- Go minimal
Strip your kit down to the essentials. Choose compact cameras, lightweight tripods, and only the gear you truly need to avoid cluttering the space. - Use wide-angle lenses
A wider focal length allows you to capture more of the scene without needing to move further back ideal when you’re backed against a wall. - Mount lights overhead
Use boom arms, wall brackets, or ceiling mounts to position lights out of the way while still providing flattering illumination. - Hide equipment
Tuck tripods into corners, use smaller light stands, and tape down loose cables to keep walkways clear and prevent accidents. - Plan movement carefully
If you’re filming handheld or moving the camera through the space, rehearse your path ahead of time. Even a few inches of clearance matter in tight quarters.
With thoughtful adjustments, small spaces can still deliver big visual impact.
6. Managing Unpredictable Weather
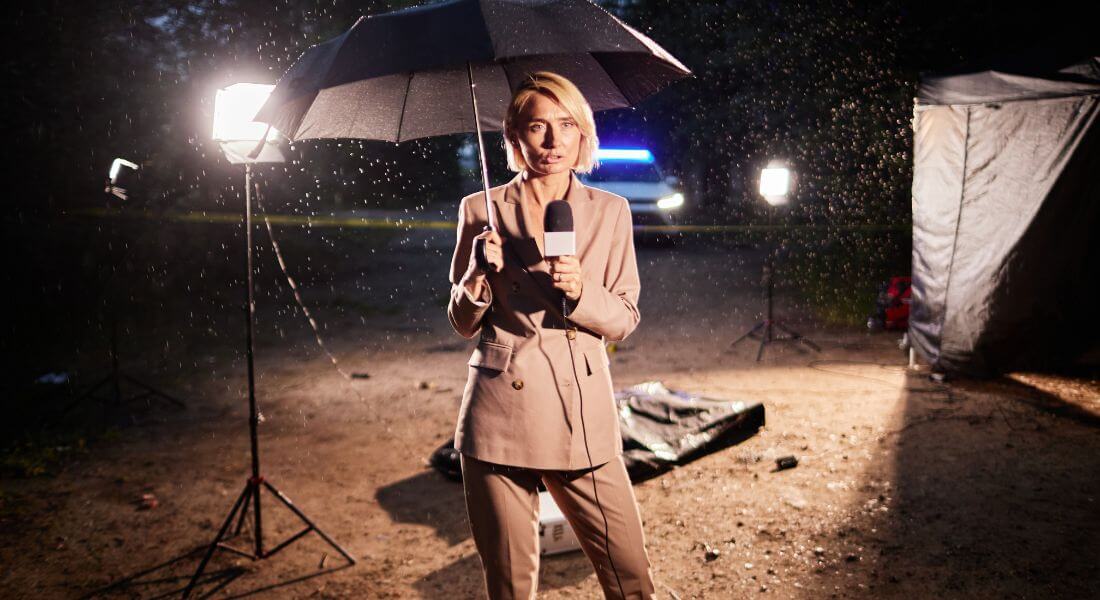
Outdoor shoots can be visually stunning but they also come with the constant risk of changing conditions. From sudden rain showers to gusty winds or temperature drops, being unprepared can cost you valuable time and footage.
How to protect your gear and footage:
- Waterproof covers
Use rain covers or weatherproof camera shells to keep water off your gear during unexpected downpours. - Microfibre cloths
Pack a few high-quality cloths to quickly wipe off moisture, snow, or condensation from lenses and screens. - Weather-sealed gear
If you shoot outdoors frequently, invest in cameras and lenses that are designed to handle tough environments without damage. - Plastic bags for storage
Use zip-lock or heavy-duty plastic bags to protect smaller accessories, batteries, or memory cards during transport or in wet conditions. - Stay flexible
Build in extra time or consider rearranging your shot list if the forecast shifts. If needed, have an indoor backup location ready to go.
When working outdoors, adaptability is just as important as preparation. A well-thought-out backup plan can save the day when the skies don’t cooperate.
7. Power and Connectivity Challenges
Remote or outdoor shoots often mean limited access to outlets and unreliable internet if any at all. Without the right prep, you could be stuck with dead batteries or missing files in the middle of nowhere.
Be prepared:
- Carry multiple charged batteries
Always bring more than you think you’ll need. Cold weather and long shoots drain batteries faster than expected. - Bring power banks
High-capacity power banks are essential for charging phones, LED lights, wireless transmitters, or other small devices on the go. - Use offline workflows
Don’t rely on cloud storage or online tools. Download scripts, shot lists, storyboards, and reference media before you leave for the shoot. - Test all equipment before you leave
Double-check battery life, memory card space, firmware updates, and power cables. Discovering a faulty charger or flat battery hours from civilisation can bring your production to a halt.
When you’re shooting off-grid, self-sufficiency is key. Power up, plan ahead, and you’ll avoid frustrating delays.
8. Getting Great Shots in Busy Public Spaces
Public places can offer dynamic, authentic visuals but filming in the middle of crowds comes with distractions, noise, and logistical headaches. Staying organised and respectful is key to a successful shoot.
Strategies to stay professional:
- Use signage
Simple “Filming in Progress” signs let people know what’s happening. This not only reduces interruptions but also helps with privacy concerns. - Keep your footprint small
Use lightweight, compact gear to stay mobile and less intrusive. Avoid large setups that block footpaths or attract unnecessary attention. - Time your shoot carefully
Choose early mornings, weekdays, or off-peak hours when foot traffic is lighter. A quieter environment means fewer interruptions and cleaner shots. - Bring an assistant
Having someone to manage bags and equipment allows you to stay focused behind the lens and keeps your gear safe from theft or accidental damage.
When you plan ahead and respect the space and people around you, even a chaotic location can become the backdrop for powerful, polished content.
9. Staying Legal and Respectful
Filming in public spaces or sensitive locations involves much more than simply pointing a camera and pressing record. To avoid legal complications and maintain positive relationships with the community, it’s crucial to approach every shoot with awareness, respect, and preparation.
Here’s what you need to keep in mind:
- Check permit requirements well in advance
Many city councils, local authorities, and private property owners require permits for commercial filming. These rules vary widely depending on the location, time, and nature of your shoot. Research the relevant regulations early, submit any applications needed, and obtain official permissions. This not only prevents costly fines or forced shutdowns but also helps ensure you’re operating within the law and on good terms with local officials. - Respect privacy rights
Avoid filming individuals without their explicit consent, particularly in close-up shots or in private or sensitive settings. When in doubt, always ask for permission before filming or include a release form. If obtaining consent isn’t possible, plan to blur faces or use other post-production techniques to protect privacy. This is especially important in crowded public spaces or residential areas where people expect a reasonable level of privacy. - Be considerate toward businesses and residents
Your filming shouldn’t disrupt daily life more than necessary. Keep walkways clear for pedestrians, minimise loud noises, and limit the use of equipment that could disturb neighbours or local businesses. Small but thoughtful actions such as notifying nearby shops or residents about your shoot schedule go a long way toward building goodwill and reducing friction.
Adhering to these legal and ethical guidelines isn’t just about avoiding trouble it’s also about fostering a positive reputation within your community. Good etiquette and professionalism will help you secure smoother, more cooperative shoots in the future, making your production process easier and more enjoyable for everyone involved.
10. Backup Plans and Contingency Kits
No matter how carefully you plan, unexpected challenges can arise during any shoot. Having backup options and essential spare gear can keep your production on track even when things don’t go as planned.
Always have a fallback ready:
- Alternative locations
Scout a backup site ahead of time in case your primary location becomes unavailable due to weather, permits, or unforeseen issues. - Extra storage
Bring spare memory cards and external drives. Running out of storage mid-shoot can cause major delays or data loss. - Redundant recording
Use a secondary audio recorder or an additional camera as a safety net to capture crucial footage and sound if your primary devices fail. - Printed shot lists
Keep physical copies of your shot list, scripts, and schedules. Phones and tablets can run out of battery or lose signal at critical moments.
Being prepared with contingencies ensures you stay flexible and professional no matter what challenges come your way.
Final Thought: Why the Toughest Shoots Often Deliver the Best Results
Shooting in challenging environments isn’t always easy but it can lead to some of your most compelling work. With the right mindset, a streamlined kit, and a few clever tricks, you’ll be ready to adapt, problem-solve, and still deliver a professional result. If you need expert help planning or managing your next shoot especially in a challenging environment, get in touch with our video production company in London. We’ll help you create high-quality content, no matter the conditions.